Cooking is not difficult. Everyone has taste, even if they don't realize it. Even if you're not a great chef, there's nothing to stop you understanding the difference between what tastes good and what doesn't. –Gérard Depardieu
I fought it for a really long time. I did not want to give up gluten — in essence, my daily bread. I was tested for Celiac and it came back negative. I gave up dairy almost a year-and-a-half ago, which was really, really hard. It was hard enough eating diary free without adding gluten to the mix so I stubbornly stuck to my gluten-laden diet because I don't have Celiac disease. I was convinced that it wouldn't help. I couldn't have been more wrong. I was eating myself sick. Within 3 days of giving up gluten, I felt better than I had in months. It's been a little over two months now and I feel like a normal person again. I can't believe what a huge difference it has made.
Coming up with menus that aren't monotonous is difficult. And living dairy and gluten free limits what you can make but necessitates cooking almost every day. Very few restaurants cater to special diets. You can only eat so many salads with vinaigrette dressing without getting bored. And there are cross-contamination issues, as well, when eating out. This week, I felt like I was out of ideas, so I rummaged around on Pinterest and found a few things I'd pinned a while ago and decided to give them a try. First up, was the most amazing Black-Eyed Pea Curry from Mel over at Mel's Kitchen Cafe. Her recipes use mostly fresh ingredients, so it is easy to substitute if necessary. This curry called for half-and-half, but I used canned coconut milk instead, added cauliflower as suggested in her notes but not included in the recipe and omitted the cilantro because I'm not a big fan. After tasting it, I could see how the cilantro would have complimented the flavors, so if you like it, I'd say go for it. As it was, I thought it was heaven on a plate. We will definitely be having more curry around here in the future.
Mel also has this casserole {she calls it a hot dish} that I've been romancing for the past year or so. It is an upscale version of one of my favorite casseroles. Mine uses cream of mushroom and cream of chicken soups and plain white rice, with a splash of soy sauce, some hamburger, onions and garlic and chow mein noodles on top. Hers uses butter, flour, milk and spices to flavor wild rice. The first time I made it, I used a wild rice blend, butter substitute and almond milk and halved the recipe but otherwise followed it exactly. The rice came out crunchy and under done, and it was all burned to the bottom of the pan. The second time I tried it, I made the same changes as before but I tried cooked the rice half-way by using only half the water and half the time, hoping that the time in the oven as part of the casserole would finish cooking it all the way. It was an epic fail. For some reason, it was too salty. Way too salty {operator error, I'm guessing} and the rice still wasn't done.
Several months ago, I gave it one more try. I still used half the amount of rice and still did a wild rice blend, but I cooked it all the way before putting it into the casserole. I also used the full amount for the sauce ingredients {subbing in dairy-free only; I was still in denial about being gluten intolerant} and added in a tablespoon of soy sauce. It was spot on. I was going to make this recipe last week, but I was still recovering from surgery, so it got bumped to this week's menu. As chance would have it, we had a leftover steak that Mr. Bug had grilled up for us on Friday night, so I decided to use it to make beef stroganoff night before last or as close to it as you can get without using dairy or gluten. I used the sauce recipe from Mel's casserole, modified slightly, and I thought it was pretty tasty. Without dairy, it isn't exact, but it is pretty darn close so I thought I'd share.
Beef Stroganoff
½ to 1 lb. beef (leftover roast beef, stew meat, steak – raw or left over), cut to bite size pieces
2 tablespoons butter substitute or olive oil
1 small onion, finely diced
2 cloves garlic, minced or pressed
8 oz. mushrooms, diced
¼ cup corn starch
1½ cups beef broth
¾ cup rice milk (or 1 cup almond milk)
½ teaspoon salt
¼ teaspoon celery salt
¼ teaspoon onion salt
¼ teaspoon garlic salt
¼ teaspoon pepper
8 oz. gluten-free pasta
• Cook pasta according to package directions. Do not drain until ready to serve.
• In a 10” skillet, brown the beef on medium high heat until juices caramelize on the bottom of the pan {works with both leftover and raw meat}. If your pan is non-stick, you don't need to add any oil, but if it is a regular pan, add a little olive oil to keep the meat from sticking. Transfer the meat to a plate and cover with foil.
• Return the skillet to the stove and add butter substitute or olive oil and melt over medium heat. Add onions, garlic and mushrooms to the skillet and cook, stirring occasionally, 5 to 7 minutes until the onions are translucent and most of the liquid has evaporated from the mushrooms. Sprinkle the corn starch over the vegetables and stir to combine. Continue stirring and cook the mixture for about 1 minute.
• Slowly whisk the broth and milk into the skillet. Add the salt, celery salt, onion salt, garlic salt and pepper and stir to combine.
• Return the meat, with any juices that might have accumulated, back to the skillet and bring the mixture to a boil over medium-high heat, stirring frequently. Continue to cook, stirring occasionally, until the sauce thickens, about 4 to 5 minutes.
• Serve over hot pasta.
Serves 4
Notes:
• I used Heartland Fusilli pasta. It was excellent. You can find it on the regular pasta aisle at Wal-Mart.
• Rice milk doesn’t thicken as much as almond milk, but I’m sensitive to almonds, so I use rice milk. Also, for some reason, sauces and gravies made with corn starch lose their “thickness” when you refrigerate them, so leftovers will have runny sauce, but it still tastes good.
• My favorite butter substitute is Earth Balance. They have the original in Wal-Mart, but I go to a health food store to find the kind made with olive oil because I like it better.
• The amount of meat doesn’t have to be exact. This is a great recipe to use up leftover roast or steak, but you can buy a steak or stew meat if you don’t have leftovers. Stew meat tends to be a little bit tougher, though.
Showing posts with label Recipes. Show all posts
Wednesday, May 28, 2014
Thursday, October 31, 2013
Wizards, Demi-Gods and the Half-Dead
Shadows of a thousand years rise again unseen,
Voices whisper in the trees, "Tonight is Halloween!"
–Dexter Kozen
Costumes have been donned. Faces have been painted. Chili has been eaten. Thinly veiled threats have been made in order to garner candy. It is Halloween!
I love Halloween. It runs in the family. Seriously. Check out my sister's totally awesome Star Trek costumes. Anyway, sometimes I tend to go a little overboard in the planning of the costumes. And the execution and completion of said plans often takes longer than expected. Nevertheless, this year the challenge has been successfully met. And I didn't even have to stay up all night to do it. Almost. But not quite.
LadyBug has been planning her costume since last year. She is Annabeth Chase from the Percy Jackson series of books. We bought and dyed the t-shirt the perfect Camp Half-Blood orange and then I appliquéd the logo on it. We bought the cap {which allows Annabeth to turn invisible} and we made the necklace together.
LadyBug is all about the details, so we couldn't have an Annabeth costume without the necklace. We made beads from cornstarch dough, painted them and strung them together to look like the beads the demi-god kids at Camp Half-Blood get at the end of each summer. The beads have something on them that represents the most significant event that happened in the past year. After we dried the beads for a few hours in the oven, we let them sit overnight. LadyBug put the first coat of paint on and then I put a second one on. She either painted or drew with a metallic paint marker the designs on all the beads except for the green one with the winged sneaker on it, which she asked me to do. Annabeth's beads, from left to right: Thalia's Tree, A Centaur in a prom dress, Greek Trireme, Winged Sneaker, Arrow from the Hunters of Artemis, Trident, Golden Fleece, Daedalus' Maze, Empire State Building.
Cornstarch Clay
1 cup salt
⅓ cup water
½ cup cornstarch
¼ cup cold water
• In a small saucepan, heat the salt and ⅓ cup water over medium-high heat for about 4 minutes, stirring occasionally.
• Remove from heat, stir in the cornstarch and add ¼ cup cold water. The mixture should now look like thick mashed potatoes; stir until it thickens.
• Let cool for a few minutes before kneading or shaping.
Notes
• If the clay is too sticky, knead in a little bit of cornstarch as needed.
• If the clay is too crumbly, place a little bit of water on your fingertips as you work with the clay to moisten.
• Air dry 1 to 4 days. For faster drying, place items on a cookie sheet and place in a 225˚ oven for 4 to 6 hours.
• Food coloring can be kneaded into the clay as desired.
• Store clay in a zippered baggie with a bit of wet sponge or a wet paper towel for up to 2 weeks.
Grasshopper asked me to make his costume in the middle of August, so I couldn't let him down. He found a set of instructions on-line for a Magicka Wizard Robe. Putting the pattern together was a bit laborious and I've almost forgotten how to sew a seam allowance bigger than ¼" or how to use pins. Once I got going, though, it was just like riding a bike and it came together pretty well.
Prettysnazzy mystical, huh? All the tweaking to the pattern paid off. The robe fits Grasshopper so well it's almost like it was custom made for him. Oh. Wait. It was.
This year, I wanted to do something besides my usual Professor McGonagall or Little Red Riding Hood. Pinspired, I decided to go with a little face paint.
Between you and me, I'm exhausted. I was up until 1:00 am finishing up and midnight the night before. I'm going to wash my face, turn off the porch light and go to bed early. Hopefully we won't get egged because we stopped giving out candy before 10:00 pm. And tomorrow I am going to do all the things I've been ignoring in order to pull off Halloween.

Voices whisper in the trees, "Tonight is Halloween!"
–Dexter Kozen
Costumes have been donned. Faces have been painted. Chili has been eaten. Thinly veiled threats have been made in order to garner candy. It is Halloween!
I love Halloween. It runs in the family. Seriously. Check out my sister's totally awesome Star Trek costumes. Anyway, sometimes I tend to go a little overboard in the planning of the costumes. And the execution and completion of said plans often takes longer than expected. Nevertheless, this year the challenge has been successfully met. And I didn't even have to stay up all night to do it. Almost. But not quite.
LadyBug has been planning her costume since last year. She is Annabeth Chase from the Percy Jackson series of books. We bought and dyed the t-shirt the perfect Camp Half-Blood orange and then I appliquéd the logo on it. We bought the cap {which allows Annabeth to turn invisible} and we made the necklace together.
LadyBug is all about the details, so we couldn't have an Annabeth costume without the necklace. We made beads from cornstarch dough, painted them and strung them together to look like the beads the demi-god kids at Camp Half-Blood get at the end of each summer. The beads have something on them that represents the most significant event that happened in the past year. After we dried the beads for a few hours in the oven, we let them sit overnight. LadyBug put the first coat of paint on and then I put a second one on. She either painted or drew with a metallic paint marker the designs on all the beads except for the green one with the winged sneaker on it, which she asked me to do. Annabeth's beads, from left to right: Thalia's Tree, A Centaur in a prom dress, Greek Trireme, Winged Sneaker, Arrow from the Hunters of Artemis, Trident, Golden Fleece, Daedalus' Maze, Empire State Building.
Cornstarch Clay
1 cup salt
⅓ cup water
½ cup cornstarch
¼ cup cold water
• In a small saucepan, heat the salt and ⅓ cup water over medium-high heat for about 4 minutes, stirring occasionally.
• Remove from heat, stir in the cornstarch and add ¼ cup cold water. The mixture should now look like thick mashed potatoes; stir until it thickens.
• Let cool for a few minutes before kneading or shaping.
Notes
• If the clay is too sticky, knead in a little bit of cornstarch as needed.
• If the clay is too crumbly, place a little bit of water on your fingertips as you work with the clay to moisten.
• Air dry 1 to 4 days. For faster drying, place items on a cookie sheet and place in a 225˚ oven for 4 to 6 hours.
• Food coloring can be kneaded into the clay as desired.
• Store clay in a zippered baggie with a bit of wet sponge or a wet paper towel for up to 2 weeks.
Grasshopper asked me to make his costume in the middle of August, so I couldn't let him down. He found a set of instructions on-line for a Magicka Wizard Robe. Putting the pattern together was a bit laborious and I've almost forgotten how to sew a seam allowance bigger than ¼" or how to use pins. Once I got going, though, it was just like riding a bike and it came together pretty well.
Pretty
This year, I wanted to do something besides my usual Professor McGonagall or Little Red Riding Hood. Pinspired, I decided to go with a little face paint.
Between you and me, I'm exhausted. I was up until 1:00 am finishing up and midnight the night before. I'm going to wash my face, turn off the porch light and go to bed early. Hopefully we won't get egged because we stopped giving out candy before 10:00 pm. And tomorrow I am going to do all the things I've been ignoring in order to pull off Halloween.
Today's post brought to you by:

Saturday, October 26, 2013
When Life Gives You Quick Cooking Oats Make No-Bake Cookies
Things turn out best for the people who make the best of the way things turn out. –John Wooden
The other day I mentioned that, must to my distaste, I'd mistakenly bought a box of quick cooking oats and didn't know what I was going to do with it because I certainly wasn't going to eat the oatmeal for breakfast. I got lots and lots of replies suggesting I make cookies. I also got several recipes. I haven't had a chance to make any of these yet, but plan to {because YUM!} and wanted to share the recipes with you and to thank you all for your comments!
This first recipe is from a very wonderful friend, Jenna.
Oatmeal Clusters
¼ cup butter
2 cups sugar
½ cup milk
1 pinch of salt
1-2 tablespoons cocoa powder
1 tsp vanilla
½ cup peanut butter
3 to 3½ cups quick cooking oats
• In a 4-quart pot, melt butter then add sugar, milk, salt and cocoa powder. Bring to a boil; boil for 1 minute exactly. Remove from heat.
• Add vanilla and peanut butter and blend well. Then add oats.
• Drop by spoonfuls on wax paper or cookie sheet to cool.
Notes:
• Cocoa can be omitted to make Peanut Butter Oatmeal Clusters
• For dairy free, use Butter Substitute instead of butter and substitute almond milk for the milk.
Jenna also sent this next recipe, which is a favorite in her husband's family. Freda sent me a link to her Mrs. McKenzie's Chocolate No-Bake Cookies, which her family has been using for the last 50 years. The ingredients are identical in both recipes, although the quantities and directions vary slightly. I'm sharing Jenna's recipe here, but check out Freda's for a slightly chocolatier version.
Oatmeal No-Bakes
½ cup butter
2 cups sugar
½ cup condensed milk
½ teaspoon salt
3 tablespoons cocoa powder
1 teaspoons vanilla
3 to 3½ cups quick cooking oats
Chopped walnuts
• In a 4-quart pot, melt butter then add sugar, milk, salt and cocoa powder. Bring to a boil; boil for 1 minute exactly. Remove from heat.
• Stir in vanilla and then add oats.
• Drop by spoonfuls on wax paper or cookie sheet to cool.
Notes:
• Butter Substitute can be used instead of butter for dairy-free cookies.
• For a dairy-free substitute for the condensed milk, simmer 1¼ cups soy, rice or almond milk in a pan until it is reduced by 60% to ½ cup. Be careful not to scald it. {For sweetened condensed milk, stir in ½ cup + 2 tablespoons sugar, and stir in over low heat until it is completely dissolved.} It will keep in the refrigerator for several days.
• Another alternative for evaporated milk is to substitute coconut milk 1:1 in the recipe. This will impart a coconut flavor to the recipe.
This final recipe is from my friend, Sparkle Girl, who is as vivacious in real life as her screen name suggests.
Energy Balls
1 cup oatmeal
½ cup mini chocolate chips
½ cup peanut butter
½ cup ground flaxseed
⅓ cup honey
1 teaspoon vanilla
• Mix ingredients together in a large bowl. Roll into bite size balls. Refrigerate to set.
Thank you Jenna, Freda and Sparkle for the recipes! And now, if you'll excuse me I suddenly have a craving for something chocolatey.
Tuesday, September 10, 2013
You Don't Know Beans
Baked beans were always the only fashionable meal for Sabbath noon in Massachusetts. A minister who is a very correct mathematician, and a bit of a wag withal, has computed that he preached regularly every Sabbath afternoon to fifty-five bushels and three pecks of baked beans, while their owners were asleep. –From a nineteenth century magazine as quoted at The Old Foodie
During the last few days before school began, I went to two different barbecues. I've now eaten my quota of hot dogs for 2013 and got to make my two favorite pot luck dishes. I took potato salad to one barbecue and my favorite baked beans to the other. These are the best baked beans you'll ever have. My aunt brought them to family gatherings and I loved them so much that when my mom planned out a little family lunch after I got home from my mission in Brasil, she asked her sister {the aforementioned aunt} to bring her baked beans. But after eating beans and rice every. single. day. for 16 months, I couldn't look another bean in the eye. Not even the best baked beans ever. It actually took a full year for me to like beans again.
While I was cooking up a big dish of beans for the barbecue {a double recipe}, I snapped a picture of some in a dainty little china dish I inherited from a neighbor to entice you to try this tasty dish. Trust me. You don't know beans until you try these beans.
Linda's Most Excellent Baked Beans
8 strips bacon
3 cans {15 oz. each} pork 'n beans — about 5 cups
½ cup ketchup
¼ cup molasses
¼ cup brown sugar
1 tablespoon mustard
½ cup onion, finely chopped
½ of a green bell pepper, seeded and chopped
½ teaspoon hickory flavored liquid smoke
¼ teaspoon pepper
• Cook and crumble bacon.
• Combine pork 'n beans, ketchup, molasses, brown sugar, mustard, onion, bell pepper, liquid smoke and pepper in a 2-quart casserole dish.
• For quick beans, cover and bake for 30 minutes; remove cover, stir and bake for an additional 30 minutes at 350˚.
• For slow cooked beans, cover and bake for 2 to 3 hours at 225˚, stirring every 30 to 45 minutes. Raise oven temperature to 350˚, uncover and bake for an additional 30 minutes.
Tags:
Brasil,
Goofy Post Titles,
Recipes
Monday, August 26, 2013
"C" is for Cookie and "D" is for Dairy-Free
Now what starts with the letter "C?" Cookie starts with "C." Let's think of other things that start with "C?" Ah, who cares about other things.
"C" is for cookie, that's good enough for me.
Oh, cookie, cookie, cookie starts with "C!"
–Cookie Monster, The Cookie Song
I'm not a big fan of baking cookies. It takes a lot of time {a minimum of 2 hours a batch. Perhaps I'm just slow?}, dirties a lot of dishes and they disappear all too quickly from the plate only to reappear on my hips and thighs later. So I mostly buy cookies. Or at least I did until I gave up dairy. I still buy Oreos, because they are dairy-free {which makes me wonder what sort of chemicals they use to concoct the "creme" centers}, and I started buying a really yummy Coconut Oatmeal Chocolate Chip cookie at a health-food shop downtown every once in a while when I'd stop in to pick up vegan sour cream for taco night. And then I decided that a $1.79 for one - 12,000 calorie cookie was kind of ridiculous. I figured out that I could buy a bag of dairy-free chocolate chips and make about 12,000 - one hundred calorie cookies {which comes out to about 8₵ a cookie} instead, so I changed my tune.
I found this recipe at The Live-In Kitchen. It was already in its third iteration, so I think it is OK to share my take on it because I've made a few tweaks.
Coconut Oatmeal Chocolate Chip Cookies
1 cup brown sugar
½ cup sugar
1 cup butter or butter substitute
2 eggs
2 teaspoons vanilla
2 cups flour
½ teaspoon salt
1 teaspoon baking soda
1½ teaspoons cinnamon
1 cup sweetened shredded coconut
2½ cups old-fashioned oats
¾ cup semi-sweet mini chocolate chips or dairy-free mini chips
• In a large mixing bowl, cream together butter and sugar. Add eggs and vanilla and beat until smooth.
• In a medium mixing bowl, combine flour, salt, baking soda, cinnamon and coconut. Slowly add to the butter, sugar and egg mixture and beat until combined. Add the oats and chocolate chips and mix to incorporate.
• Drop by rounded tablespoon onto a baking sheet. Bake at 350˚ for approximately 10 minutes; let stand on baking sheet for 2 minutes before removing to a cooling rack. Store in an airtight container.
Makes about 6 dozen
Notes:
• If you are using real butter, use it at cool room temperature. If you are using butter substitute {I prefer the kind made with olive oil}, use it straight from the fridge.
• 10 minutes in my oven plus 2 minutes on the baking sheet {a preheated Pampered Chef baking stone} produces the perfect cookie — not to crispy and not too doughey. You may have to adjust for your oven and/or baking sheet, especially if you make larger cookies.
--
And everyone needs a good chocolate chocolate chip cookie recipe, even the dairy-free folks.
Arlene's Chocolate Chocolate Chip Cookies
1 cup shortening
½ cup butter or butter substitute
2 cups sugar
1 cup brown sugar
5 eggs
2 teaspoons vanilla
5 cups flour
⅔ cup cocoa powder
2 teaspoons baking soda
1 teaspoon salt
¾ cups milk chocolate chips or dairy-free mini chips
• In a large mixing bowl, cream together shortening, butter and sugars. Add eggs and vanilla and beat until smooth.
• In a medium mixing bowl, combine flour, cocoa powder, baking soda and salt. Slowly add to the butter, sugar and egg mixture and beat until combined. Stir in the chocolate chips.
• Drop by rounded tablespoon onto a baking sheet. Bake at 350˚ for approximately 10 minutes; let stand on baking sheet for 2 minutes before removing to a cooling rack. Store in an airtight container.
Makes about 8 dozen
Notes:
• If you are using real butter, use it at cool room temperature. If you are using butter substitute {I prefer the kind made with olive oil}, use it straight from the fridge.
• The type of cocoa powder you use makes a difference. In the first batch, I used regular cocoa powder. I was disappointed with the color and the flavor. The second time I made these, I used Hershey's Special Dark, which is a blend of regular and Dutch-processed cocoas and it made a huge difference. Someday, I may even get my hands on 100% Dutch-processed cocoa.
• Obviously, the flavor will be different if you use milk chocolate chips versus the dairy-free semi-sweet chips. Whichever chip you use, I highly recommend that you use mini chips. They're just so darn cute.
• 10 minutes in my oven plus 2 minutes on the baking sheet {a preheated Pampered Chef baking stone} produces the perfect cookie — not too crispy and not too doughy. You may have to adjust for your oven and/or baking sheet, especially if you make larger cookies.
Wednesday, August 14, 2013
Easy Zucchini Quiche Supreme
When I pass a flowering zucchini plant in a garden, my heart skips a beat. –Gwyneth Paltrow
It is that time of year again. Zucchini season! And I love zucchini. Did you know that August 8th is National Zucchini Day, otherwise known as Sneak Some Zucchini Onto Your Neighbor's Porch day? I don't usually grow zucchini because I have a very kind neighbor who always brings me some of hers. She doesn't even have to sneak it over because I always appreciate it. Zucchini is awesome.
I know it's been a few days, but if someone snuck you some zucchini and you're still wondering what to do with it, try out this bit of deliciousness.
Easy Zucchini Quiche Supreme
2 medium-large zucchini {about 4 cups} sliced about ½" thick and quartered
4 oz. {about 1 cup} coarsely chopped mushrooms
¼-½ cup finely chopped onion {to taste}
3 large tomatoes {about 1½ cups}, seeded and chopped
½ cup butter or butter substitute
2 eggs, well beaten
1 clove garlic, minced or pressed
2 tablespoons dried parsley or ¼ cup + 2 tablespoons fresh minced parsley
¼ teaspoon dried basil or ¾ teaspoon fresh minced basil
¼ teaspoon dried oregano or ¾ teaspoon fresh oregano basil
½ teaspoon salt
½ teaspoon pepper
1 {8 oz.} can crescent rolls
2 teaspoons mustard
2 cups grated Monterey cheese
• In a large skillet, melt butter over medium heat; sauté zucchini, mushrooms and onion until tender. Add tomatoes and heat through.
• Heat oven to 375˚. In a large mixing bowl combine eggs, garlic, parsley, basil, oregano, salt and pepper.
• Separate crescent rolls and press into the bottom of a 9" x 13" pan. Spread the crescent rolls with mustard and place the zucchini, mushrooms, onions and tomatoes into the pan. Pour the egg mixture over the zucchini and then top with cheese.
• Bake for 18-20 minutes, making sure the eggs have set. Let cool 10 minutes before serving.
Notes:
• I made my quiche dairy-free by using butter substitute and vegan mozzarella. I used a lot less than 2 cups {probably about ½ cup} because it just doesn't act or taste like real cheese, but does add a bit of nice flavor. The fresh veggies give enough great flavor that I really didn't miss the cheese at all. As a matter of fact, it was so yummy that Mr. Bug and I ate nearly half the quiche between us.
• If you don't have all of the veggies called for, substitute in what you've got. It would be delicious with yellow squash and/or bell peppers of any color.
For lots of other yummy zucchini recipes, here's a fun recipe book. To print the booklet, print the file out on both sides of the paper {if your printer won't do it automatically, print odd pages first, flip the pages and arrange so that the first page is on top, printed side down, and so forth. Then print the even pages}. Fold down the middle and you've got lots of new recipes to try.

Tags:
Dairy-Free,
It's a Matter of Taste,
Recipes
Wednesday, August 7, 2013
Dairy-Free Basics: Taco Seasoning and Ranch Dressing
Food allergy side effects may include healthier eating habits, improved baking skills and an increased number of meals together at the dinner table. –Tiffany Glass Ferreira at Food Allergy Fun
Going dairy-free was not a lot of fun. Besides all the yummy things like pizza and ice cream that you have to give up, dairy is hidden in a lot of places you'd never expect to find it. Shortly after giving it up I made chicken tacos, which is a favorite at Bug Cottage. At the time, I was kind of at a loss about what to eat and when I planned my menu for that week I figured I'd be safe as long as I didn't put any cheese on mine. As I was putting the tacos together, I decided to check the ingredients and discovered that there is dairy in the seasoning packets you buy from the grocery store. I didn't know what to do. It was getting late and everyone was hungry. So I made the tacos for my family and had a bowl of cereal {with rice milk} for myself.
Later, after talking with a neighbor who has kids with lots of food sensitivities and allergies, she gave me good recipe. If you've been dairy-free for a while, this is probably old news but I thought I'd share anyway.
Taco Seasoning
½ tablespoon chili powder
⅛ teaspoon garlic powder
⅛ teaspoon onion powder
⅛ teaspoon crushed red pepper flakes {or ⅛ teaspoon cayenne pepper}
⅛ teaspoon dried oregano
¼ teaspoon paprika
½ teaspoon Cumin
½ teaspoon salt
¼ teaspoon pepper
½ teaspoon dried onion flakes
¾ teaspoon Pampered Chef Southwest Seasoning {optional}
• Combine all dry ingredients. Add seasoning and ⅓ cup water to one pound of meat. Stir to combine; simmer until the liquid is gone.
--
Ranch dressing was never my favorite, but as soon as I couldn't have it anymore, I suddenly wanted it. My friend, the same one who gave me the taco seasoning recipe, gave me this yummy dairy-free version. I like it a lot better than the lactose-laden original. Probably because it doesn't give me heartburn.
Ranch Dressing
1 cup mayonnaise
2 teaspoons apple cider vinegar
1 tablespoon dried parsley or 3 tablespoons fresh parsley, finely minced
1 teaspoon onion powder
⅓ teaspoon garlic powder
¼ teaspoon salt
¼ teaspoon pepper
• Mix mayonnaise and vinegar together until smooth. Add parsley and spices; stir to combine. Keep refrigerated.
Lately, I've been on a fresh-herb kick. Dried herbs are good. And it takes a little more time to chop fresh ones, but it seems like the fresh ones are just a little bit better. Plus, they make nice garnishes.
Tags:
Dairy-Free,
It's a Matter of Taste,
Recipes
Wednesday, July 31, 2013
{Dairy Free} Zuppa Toscana
A dairy intolerant woman went into a local restaurant for a meal and asked the waiter, “I can't eat anything with dairy in it. Can you tell me how this meal is prepared?”
“Oh yes,” said the waiter, smiling helpfully, “It’s cooked in a Wok!” –adaped from WhatAllergy.com
Dairy has bothered me with varying degrees of severity/ annoyance for about as long as I remember. But over the last couple of years it has gotten worse. About seven months ago, I went dairy-free. I immediately felt better, but soon realized that I should probably be a whole-lot-of-other-things-free too. Giving up dairy was hard and I'm stubbornly avoiding trying to weed out any other intolerances, especially when the official test said I don't have Celiac Disease {gluten allergy}, which is pretty serious if left unaddressed. But that's an adventure for another day.
When giving up dairy, I looked for ways to find substitutes at first, but there are just some things that can't be recreated without dairy, so I only substitute when it doesn't alter the food too much. Mostly, I look for recipes that don't have dairy in them in the first place so they don't feel incomplete without it. It's always fun, though, to find a good dairy-free recreation of a dish that usually has dairy in it. Today, I want to share a really yummy dairy-free {and gluten-free if you use the right mayonnaise and sausage} Zuppa Toscana.
Zuppa Toscana1 lb. mildly spicy sausage
½ cup finely diced onions
1 tablespoon finely chopped chives
1½ tablespoons finely diced fresh parsley or 1½ teaspoons dried parsley
⅛ teaspoon red pepper flakes
2 teaspoons salt
½ teaspoon pepper
2½ lbs. red potatoes, diced
¼ cup mayonnaise
4 cups rice milk
• In a large saucepan, brown sausage; drain off excess grease. Add onions to sausage and cook until onions turn clear. Stir in chives, parsley, red pepper flakes, salt and pepper. Add potatoes. Whisk together mayonnaise and about ¾ cup rice milk. Add remaining rice milk to ingredients in the pan and then stir in mayonnaise and milk mixture.
• Bring to a boil; reduce heat and simmer together until potatoes are tender.
Serves 5-6
Notes:
• I used sausage labeled as "mild spice," and with the red pepper flakes it wasn't too spicy. I like things mild so you can increase the spiciness of the dish by getting a medium or hot sausage.
Tags:
Dairy-Free,
It's a Matter of Taste,
Recipes
Friday, May 31, 2013
Mrs. Potato Head
A skin have I, more eyes than one. I can be very nice when I am done. –A Potato
It's been a really long time since I posted any kind of recipe. It's not that I haven't been cooking. But I posted most of my favorite recipes. Also, I just found that getting good {i.e. appetizing} photos of food to be difficult. And photos to accompany a recipe are kind of a requisite. I mean, isn't it the photo that draws you in and makes you want to try the recipe? Nevertheless, I am posting a couple of recipes today with somewhat non-spectacular photos.
Since I went dairy-free in January of this year, I've been limited in what I can eat. There are milk products in everything from chocolate to taco seasoning to bouillon cubes. It is kind of ridiculous. Over the past several months, I have been relying heavily on Mel's Kitchen Cafe to replace my dairy-laden casseroles. Mel does not use many canned/prepared items {i.e. cream-of-whichever soup} in her recipes, so it is easy to use dairy substitutes. I particularly enjoyed her post on food allergies, during Food Allergy Awareness Week earlier this month.
Today I want to share a couple of potato recipes. Potatoes are a tricky business for dairy-free folks. While they do not contain dairy themselves, they aren't particularly appetizing with out it. Mashed potatoes with almond milk and butter substitute are not bad. As a matter of fact, the Not-So-Little Bugs didn't even notice. But I'm not too fond of the sour cream substitute I've been able to find and wouldn't really like to try it on a baked potato. Whipping up a batch of flavored instant potatoes is out of the question. So, I've been looking for different ways to dress up a potato. Here's what I've come up with.
Garlic & Herb Potatoes
8 medium to large red potatoes
1 teaspoon fresh minced rosemary or ¼ teaspoon dried rosemary
1 teaspoon fresh minced thyme or ¼ teaspoon dried thyme
1 teaspoon fresh minced oregano or ¼ teaspoon dried oregano
1 tablespoon fresh minced parsley or 1 teaspoon dried parsley
½ teaspoon salt
⅛ teaspoon pepper
¼ teaspoon paprika
⅛ teaspoon cayenne pepper
2 cloves garlic, minced or pressed
¼ cup olive oil, butter or butter substitute
• Scrub potatoes and dice into ½" - 1" cubes. Fill a 4-quart pot about half-way with water and bring to a boil. When the water reaches a boil, add 1 teaspoon salt and the diced potatoes all at once. Return to a boil and boil potatoes for 5 minutes. Drain potatoes.
• Meanwhile, in a small mixing bowl add rosemary, thyme, oregano, parsley, salt, pepper, paprika, cayenne pepper and garlic to melted butter or olive oil. Toss together with potatoes to coat.
• Place potatoes in a greased 9" x 13" baking dish and place in a 350˚ oven. Bake for 1 hour, stirring every 15 minutes.
Notes:
• For crispy wedges, cut potatoes into wedges rather than dicing them. Combine seasonings as directed and toss with potatoes to coat. Place in a single layer on a baking sheet and bake as directed.
• I've tried this recipe with dried and fresh herbs, as well as russet and red potatoes and it is delicious no matter which way you make it.
Gram's Best Potato Salad
1 dozen eggs
5 lbs. red potatoes
Dressing
2 cups mayonnaise
2 tablespoons sugar
1 tablespoon red wine vinegar
1 tablespoon spicy brown mustard
Additional Ingredients
½ cup pickle juice
1½ cups chopped celery
¼ cup finely diced onion
½ of a dill pickle, finely diced
2 teaspoons salt
2 teaspoons pepper
¼ cup + 2 tablespoons fresh minced parsley or 2 tablespoons dried parsley
Paprika
• Place eggs in the bottom of a 4-quart pot and add cold water to 1" above eggs. Bring to a boil over high heat; cover pot, reduce heat to low and simmer for 5 minutes. Remove from heat and allow eggs to stand in hot water for 10 minutes. Drain water from eggs; fill pot with cold water and ice and allow eggs to cool.
• Peel and slice the boiled eggs; reserve the slices with pretty yellow centers for garnish on top of the potato salad and grate the remaining eggs to be added to the potato salad.
• Scrub and dice potatoes. Fill an 8-quart or 10-quart pot about half-way with water and bring to a boil. When the water reaches a boil, add 1 tablespoon salt and the diced potatoes all at once. Return to a boil and boil potatoes for 10 minutes.
• Meanwhile, to prepare dressing, mix mayonnaise, sugar, red wine vinegar and spicy brown mustard together in a small mixing bowl.
• After the potatoes have boiled for 10 minutes, drain them and transfer to a large mixing bowl. Pour the pickle juice directly on top of the hot potatoes. Add grated eggs, celery, onion, dill pickle, salt, pepper and parsley and stir to combine. Toss together with dressing. Top with sliced eggs and sprinkle with paprika. Refrigerate 6 to 8 hours.
Notes:
• There are no notes, except to say that no picnic is complete without a good potato salad and this is a good potato salad
.
It's been a really long time since I posted any kind of recipe. It's not that I haven't been cooking. But I posted most of my favorite recipes. Also, I just found that getting good {i.e. appetizing} photos of food to be difficult. And photos to accompany a recipe are kind of a requisite. I mean, isn't it the photo that draws you in and makes you want to try the recipe? Nevertheless, I am posting a couple of recipes today with somewhat non-spectacular photos.
Since I went dairy-free in January of this year, I've been limited in what I can eat. There are milk products in everything from chocolate to taco seasoning to bouillon cubes. It is kind of ridiculous. Over the past several months, I have been relying heavily on Mel's Kitchen Cafe to replace my dairy-laden casseroles. Mel does not use many canned/prepared items {i.e. cream-of-whichever soup} in her recipes, so it is easy to use dairy substitutes. I particularly enjoyed her post on food allergies, during Food Allergy Awareness Week earlier this month.
Today I want to share a couple of potato recipes. Potatoes are a tricky business for dairy-free folks. While they do not contain dairy themselves, they aren't particularly appetizing with out it. Mashed potatoes with almond milk and butter substitute are not bad. As a matter of fact, the Not-So-Little Bugs didn't even notice. But I'm not too fond of the sour cream substitute I've been able to find and wouldn't really like to try it on a baked potato. Whipping up a batch of flavored instant potatoes is out of the question. So, I've been looking for different ways to dress up a potato. Here's what I've come up with.
Garlic & Herb Potatoes
| Garlic & Herb Potatoes (with Lamb Shanks) Photo courtesy of Shay at Quilting In My Pyjamas |
1 teaspoon fresh minced rosemary or ¼ teaspoon dried rosemary
1 teaspoon fresh minced thyme or ¼ teaspoon dried thyme
1 teaspoon fresh minced oregano or ¼ teaspoon dried oregano
1 tablespoon fresh minced parsley or 1 teaspoon dried parsley
½ teaspoon salt
⅛ teaspoon pepper
¼ teaspoon paprika
⅛ teaspoon cayenne pepper
2 cloves garlic, minced or pressed
¼ cup olive oil, butter or butter substitute
• Scrub potatoes and dice into ½" - 1" cubes. Fill a 4-quart pot about half-way with water and bring to a boil. When the water reaches a boil, add 1 teaspoon salt and the diced potatoes all at once. Return to a boil and boil potatoes for 5 minutes. Drain potatoes.
• Meanwhile, in a small mixing bowl add rosemary, thyme, oregano, parsley, salt, pepper, paprika, cayenne pepper and garlic to melted butter or olive oil. Toss together with potatoes to coat.
• Place potatoes in a greased 9" x 13" baking dish and place in a 350˚ oven. Bake for 1 hour, stirring every 15 minutes.
Notes:
• For crispy wedges, cut potatoes into wedges rather than dicing them. Combine seasonings as directed and toss with potatoes to coat. Place in a single layer on a baking sheet and bake as directed.
• I've tried this recipe with dried and fresh herbs, as well as russet and red potatoes and it is delicious no matter which way you make it.
Gram's Best Potato Salad
1 dozen eggs
5 lbs. red potatoes
Dressing
2 cups mayonnaise
2 tablespoons sugar
1 tablespoon red wine vinegar
1 tablespoon spicy brown mustard
Additional Ingredients
½ cup pickle juice
1½ cups chopped celery
¼ cup finely diced onion
½ of a dill pickle, finely diced
2 teaspoons salt
2 teaspoons pepper
¼ cup + 2 tablespoons fresh minced parsley or 2 tablespoons dried parsley
Paprika
• Place eggs in the bottom of a 4-quart pot and add cold water to 1" above eggs. Bring to a boil over high heat; cover pot, reduce heat to low and simmer for 5 minutes. Remove from heat and allow eggs to stand in hot water for 10 minutes. Drain water from eggs; fill pot with cold water and ice and allow eggs to cool.
• Peel and slice the boiled eggs; reserve the slices with pretty yellow centers for garnish on top of the potato salad and grate the remaining eggs to be added to the potato salad.
• Scrub and dice potatoes. Fill an 8-quart or 10-quart pot about half-way with water and bring to a boil. When the water reaches a boil, add 1 tablespoon salt and the diced potatoes all at once. Return to a boil and boil potatoes for 10 minutes.
• Meanwhile, to prepare dressing, mix mayonnaise, sugar, red wine vinegar and spicy brown mustard together in a small mixing bowl.
• After the potatoes have boiled for 10 minutes, drain them and transfer to a large mixing bowl. Pour the pickle juice directly on top of the hot potatoes. Add grated eggs, celery, onion, dill pickle, salt, pepper and parsley and stir to combine. Toss together with dressing. Top with sliced eggs and sprinkle with paprika. Refrigerate 6 to 8 hours.
Notes:
• There are no notes, except to say that no picnic is complete without a good potato salad and this is a good potato salad
.
Friday, March 22, 2013
Random Bits: Vol 7
Happiness is not a matter of intensity but of balance, order, rhythm and harmony. –Thomas Merton
Absentia
I think about blogging a lot. I write posts in my head all the time. But getting them down “on paper” is another matter. This post is a patchwork of the things that have been on my mind the last week or so. I've often wished for a USB port behind my ear, so that I could plug in and download my thoughts. Then I could blog things one at a time. It's been so long, I don't know if anyone is left out there to read this. I hope you all haven't given up on me. There is still a ton of traffic here and I check at least once a day to see if there are new comments. I stopped getting excited a couple of weeks ago, though, because all there is is spam, spam and more spam. I know some of you are also getting spammed into oblivion. Do you think if we asked nicely, that Google/Blogger would put anonymous commenting in its own category to be turned on and off at will and independent of any other commenting options?
A Pocket Dial and Other Telephone Related Chatter
At work yesterday afternoon I answered the phone, but couldn't understand what the person on the other end said in reply to my “how may I help you?” spiel. This isn't uncommon; lots of our customers speak English as a second language, so I took a deep breath and prepared to do my best. However, the unintelligible reply was followed by a long silence, to which I answered “hello?” Then there was a snippet of a conversation, in perfect English, about bone spurs on someone's heels. I tried another “hello?” but it was obvious that I was not included in the conversation.
I'm still scratching my head over it. You have to be a very persistent pocket dialer in order to get to me. First you have to dial the main number, which could be on anyone's speed dial. But then you have to select option 4 or dial my direct extension. And bone spurs, even ones on heels, have absolutely nothing to do with how many people we billed them for last month.
There seems to be a funny phenomenon going on at my desk. Aside from the occasional pocket dial, no one ever calls me at work unless I'm in the bathroom. It's getting so I'm afraid to even go, because I know I'll have voice mail when I get back, which is ten times more work to handle than a straight up phone call. Three times this week, I've come back from a quick potty break to find I had a message. How is that even possible?
My New Best Friend
I'd like to introduce you to Mel. She's my new best friend, which I'm sure she'd be interested to know since we've never met. Mel has a food blog. And not just any food blog. It's a good food blog, which is just what I've been missing in my life.
A couple of months ago, I gave up dairy due to intolerance. Thanks to some great advice from Regan and P., who are both dairy free, I survived my first few weeks of wondering what I actually can eat. {Sidebar: there are milk or milk products in everything, from chocolate to bread to taco seasoning packets. Strangely, there is not milk found in Oreos.} Regan hooked me up with a good dairy-free “butter” and gave me lots of advice on how to live dairy free. P. commiserated over the loss of most chocolate products in our diets. And I muddled through, hunting down every last allergen ingredient list that could be found on the internet for fast-food restaurants. When nothing was available on-line, I called ahead to places I was contemplating eating at and harassed the poor employees into giving me the low-down on what was dairy free. I mourned the loss of pizza and ice cream and my favorite casseroles, which all have cream-of-some-kind-or-other soup in them. And I kind of quit cooking on a regular basis.
Eventually, I found anew-age hippie herb shop that sells lots organic and whole foods, as well as lots of dairy free food items like vegan “cheese” and “sour cream.” I was able to make some of my favorite dishes with the diary free substitutes, but there were still some serious holes in my menu.
Then I met Mel and her fabulous food blog. She has menu plans and a month's worth of meals that take 30 minutes or less. She's not dairy free, but her recipes are fresh, without a lot of processed foods. And she doesn't cook with cream-of-anything soup {at least not that I've seen}. Everything we've tried so far has been delicious. The wraps {with dairy free cheese and sour cream substitutes} we had on Monday were so good, I ate the left-overs for breakfast on Tuesday morning. And the Sweet & Sour Chicken we had for dinner on Wednesday night was also lunch on Thursday and dinner tonight. I've never been so excited to have left-overs. {Sidebar: whoever invented sweet & sour sauce is a genius. Seriously. On the one hand it is so innocently sweet that you want to take it home to meet your mother and on the other, so sour that your eyes roll back a little in your head.} {Sidebar: P., the sweet & sour chicken is gluten-free if you use the right soy sauce. And I'm wondering if you could use honey instead of sugar. This recipe seems to be saying “use honey in me.”} I've pinned about a dozen other things to try from Mel's, and I'm looking forward to it!
I've bookmarked a few other food blogs that look promising, and as soon as I stop drooling over Mel's Kitchen Cafe, I'm going to take a serious look and see what other food adventures I can take.
Quilter's Favorites
You meet the most amazing people in blogland that you might not otherwise ever encounter in real life. Have you met Geta yet? She is a seriously amazing quilter. In a little under two months, she is hosting the Quilter's Favorites linky party.
It looks to be quite the blog event. Anyone and everyone can participate. Geta's put together a list of questions that you can print out and answer as you quilt over the next few weeks. Then during the week of May 10th, you can post your answers, link up and then go learn something new from the other quilters who link up. I'm looking forward to clicking around the blogosphere to see what new project I just have to start.
The Tale of the Tortoise and the Snail or, What I'm Working on For Friday Night Sew-In
I haven't officially participated in Friday Night Sew-In for a year now. But with Mr. Bug on 3rd shift {midnight to 10:00 am}, pretty much every Friday night is Friday Night Sew-In at Bug Cottage. {Sidebar: I am so happy to announce that Mr. Bug is working days again! Do a little happy dance with me!} Even though Mr. Bug is home tonight, I'm doing Friday Night Sew-In, because he's still transitioning from being a nocturnal animal. We'll catch up on our TV and I'm going to see if I can get a little quilting done on Miss Butterfly's Zig-Zag quilt. I was hoping to be a little farther along on it by now.
Since I last posted {11 days ago}, I still had to put the back together before I could baste the quilt. Then I had to make the binding and I decided that I needed to pre-wash and dry the batting {for shrinkage purposes, and not at all because I was procrastinating; see also, persnickety}. After that I was distracted by some chain piecing on a really, really, really old Ph.D quilt that I hope to finish sometime this decade. I was certain that the Zig-Zag quilt need to rest for a little bit, kind of like bread dough. And I knew that basting it was going to be pretty hairy. I was right. It took 2½ hours. I procrastinated that until last weekend and have been working on the straight-line quilting a little bit at a time this week. I had a couple of no-sew days {I must have been really tired or busy to have a day go by without sewing at least a little bit; see also, Mel's Kitchen Cafe}. I have just shy of half of the white zig-zags finished. My goal for FNSI is to finish the rest of those and then wind bobbins for the threads for the FMQ in the colored zig-zags. I will probably bind the quilt before I do the FMQ {the quilt should be pretty stabilized by then and it is just that much less bulk to work with. Plus, it keeps lint from building up on the quilt as it rubs off the extra batting around the edges} , but it is always good to be prepared.
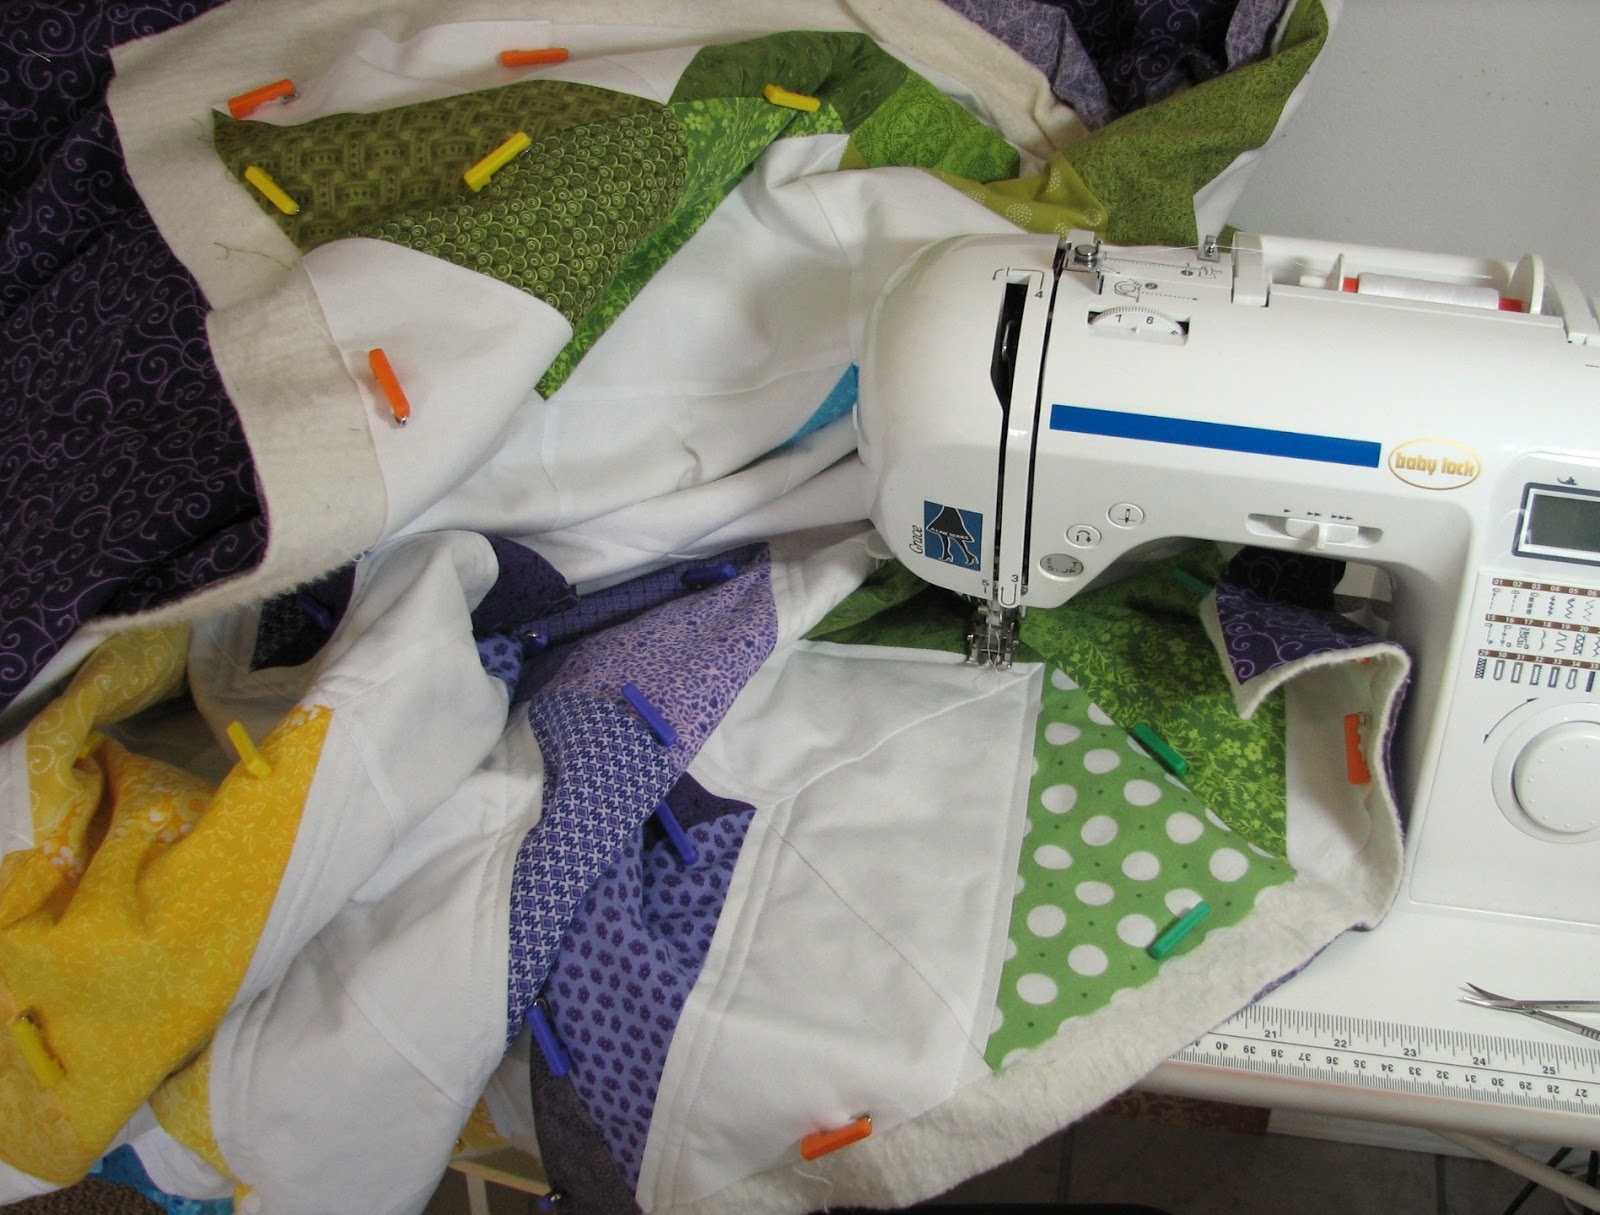
Why, yes. That is a twin size quilt, all 72” x 96” of it, balanced on my little sewing table. When I quilt, I hold as much of it as I can in my lap and then fold or roll the rest of it to fit on the table. This is the biggest quilt I've done, but so far, it is working out nicely.

Extreme Shepherding
Confession time: I started this post in December. I knew that in my next hodge-podge post, I wanted to show you this funny video. So I threw the HTML code in to a draft and have been moving the scheduled post date up by a few weeks every time the draft got old enough to drop down into the list of already posted stuff and get lost. There wasn't anything else in this post until today. And I'm hoping this is still as funny as I remember!
Absentia
I think about blogging a lot. I write posts in my head all the time. But getting them down “on paper” is another matter. This post is a patchwork of the things that have been on my mind the last week or so. I've often wished for a USB port behind my ear, so that I could plug in and download my thoughts. Then I could blog things one at a time. It's been so long, I don't know if anyone is left out there to read this. I hope you all haven't given up on me. There is still a ton of traffic here and I check at least once a day to see if there are new comments. I stopped getting excited a couple of weeks ago, though, because all there is is spam, spam and more spam. I know some of you are also getting spammed into oblivion. Do you think if we asked nicely, that Google/Blogger would put anonymous commenting in its own category to be turned on and off at will and independent of any other commenting options?
A Pocket Dial and Other Telephone Related Chatter
At work yesterday afternoon I answered the phone, but couldn't understand what the person on the other end said in reply to my “how may I help you?” spiel. This isn't uncommon; lots of our customers speak English as a second language, so I took a deep breath and prepared to do my best. However, the unintelligible reply was followed by a long silence, to which I answered “hello?” Then there was a snippet of a conversation, in perfect English, about bone spurs on someone's heels. I tried another “hello?” but it was obvious that I was not included in the conversation.
I'm still scratching my head over it. You have to be a very persistent pocket dialer in order to get to me. First you have to dial the main number, which could be on anyone's speed dial. But then you have to select option 4 or dial my direct extension. And bone spurs, even ones on heels, have absolutely nothing to do with how many people we billed them for last month.
There seems to be a funny phenomenon going on at my desk. Aside from the occasional pocket dial, no one ever calls me at work unless I'm in the bathroom. It's getting so I'm afraid to even go, because I know I'll have voice mail when I get back, which is ten times more work to handle than a straight up phone call. Three times this week, I've come back from a quick potty break to find I had a message. How is that even possible?
My New Best Friend
I'd like to introduce you to Mel. She's my new best friend, which I'm sure she'd be interested to know since we've never met. Mel has a food blog. And not just any food blog. It's a good food blog, which is just what I've been missing in my life.
A couple of months ago, I gave up dairy due to intolerance. Thanks to some great advice from Regan and P., who are both dairy free, I survived my first few weeks of wondering what I actually can eat. {Sidebar: there are milk or milk products in everything, from chocolate to bread to taco seasoning packets. Strangely, there is not milk found in Oreos.} Regan hooked me up with a good dairy-free “butter” and gave me lots of advice on how to live dairy free. P. commiserated over the loss of most chocolate products in our diets. And I muddled through, hunting down every last allergen ingredient list that could be found on the internet for fast-food restaurants. When nothing was available on-line, I called ahead to places I was contemplating eating at and harassed the poor employees into giving me the low-down on what was dairy free. I mourned the loss of pizza and ice cream and my favorite casseroles, which all have cream-of-some-kind-or-other soup in them. And I kind of quit cooking on a regular basis.
Eventually, I found a
Then I met Mel and her fabulous food blog. She has menu plans and a month's worth of meals that take 30 minutes or less. She's not dairy free, but her recipes are fresh, without a lot of processed foods. And she doesn't cook with cream-of-anything soup {at least not that I've seen}. Everything we've tried so far has been delicious. The wraps {with dairy free cheese and sour cream substitutes} we had on Monday were so good, I ate the left-overs for breakfast on Tuesday morning. And the Sweet & Sour Chicken we had for dinner on Wednesday night was also lunch on Thursday and dinner tonight. I've never been so excited to have left-overs. {Sidebar: whoever invented sweet & sour sauce is a genius. Seriously. On the one hand it is so innocently sweet that you want to take it home to meet your mother and on the other, so sour that your eyes roll back a little in your head.} {Sidebar: P., the sweet & sour chicken is gluten-free if you use the right soy sauce. And I'm wondering if you could use honey instead of sugar. This recipe seems to be saying “use honey in me.”} I've pinned about a dozen other things to try from Mel's, and I'm looking forward to it!
I've bookmarked a few other food blogs that look promising, and as soon as I stop drooling over Mel's Kitchen Cafe, I'm going to take a serious look and see what other food adventures I can take.
Quilter's Favorites
You meet the most amazing people in blogland that you might not otherwise ever encounter in real life. Have you met Geta yet? She is a seriously amazing quilter. In a little under two months, she is hosting the Quilter's Favorites linky party.
It looks to be quite the blog event. Anyone and everyone can participate. Geta's put together a list of questions that you can print out and answer as you quilt over the next few weeks. Then during the week of May 10th, you can post your answers, link up and then go learn something new from the other quilters who link up. I'm looking forward to clicking around the blogosphere to see what new project I just have to start.
The Tale of the Tortoise and the Snail or, What I'm Working on For Friday Night Sew-In
I haven't officially participated in Friday Night Sew-In for a year now. But with Mr. Bug on 3rd shift {midnight to 10:00 am}, pretty much every Friday night is Friday Night Sew-In at Bug Cottage. {Sidebar: I am so happy to announce that Mr. Bug is working days again! Do a little happy dance with me!} Even though Mr. Bug is home tonight, I'm doing Friday Night Sew-In, because he's still transitioning from being a nocturnal animal. We'll catch up on our TV and I'm going to see if I can get a little quilting done on Miss Butterfly's Zig-Zag quilt. I was hoping to be a little farther along on it by now.
Since I last posted {11 days ago}, I still had to put the back together before I could baste the quilt. Then I had to make the binding and I decided that I needed to pre-wash and dry the batting {for shrinkage purposes, and not at all because I was procrastinating; see also, persnickety}. After that I was distracted by some chain piecing on a really, really, really old Ph.D quilt that I hope to finish sometime this decade. I was certain that the Zig-Zag quilt need to rest for a little bit, kind of like bread dough. And I knew that basting it was going to be pretty hairy. I was right. It took 2½ hours. I procrastinated that until last weekend and have been working on the straight-line quilting a little bit at a time this week. I had a couple of no-sew days {I must have been really tired or busy to have a day go by without sewing at least a little bit; see also, Mel's Kitchen Cafe}. I have just shy of half of the white zig-zags finished. My goal for FNSI is to finish the rest of those and then wind bobbins for the threads for the FMQ in the colored zig-zags. I will probably bind the quilt before I do the FMQ {the quilt should be pretty stabilized by then and it is just that much less bulk to work with. Plus, it keeps lint from building up on the quilt as it rubs off the extra batting around the edges} , but it is always good to be prepared.
Why, yes. That is a twin size quilt, all 72” x 96” of it, balanced on my little sewing table. When I quilt, I hold as much of it as I can in my lap and then fold or roll the rest of it to fit on the table. This is the biggest quilt I've done, but so far, it is working out nicely.

Extreme Shepherding
Confession time: I started this post in December. I knew that in my next hodge-podge post, I wanted to show you this funny video. So I threw the HTML code in to a draft and have been moving the scheduled post date up by a few weeks every time the draft got old enough to drop down into the list of already posted stuff and get lost. There wasn't anything else in this post until today. And I'm hoping this is still as funny as I remember!
Monday, January 16, 2012
Various and Sundry Monday: Vol. 22
If you put your happiness in temporary things, your happiness will only be temporary. –Steven A. Cramer
A Week of Giveaways Directory
I am so happy with the huge response to my week of giveaways! Thanks to each and every one of you who entered. I have so enjoyed reading your comments and hope to squeeze in a little time to reply to each of you before the giveaways close. You can enter through 10:00 pm on Thursday, January 19th and the winners will be announced on the 21st. If you haven't already, check them out.
• Embroidery Gift Pack
• Backyard Baby Fat Quarter Bundle
• $50 Long-Arm Machine Quilting Gift Certificate
• Polka-Dot Quilt
• Machine Quilting Gift Pack
My Kingdom for a Butter Dish
A long time ago, in a galaxy far, far away . . . wait. That's not right. Different story. Let's try again. Sometime last summer, I'm not exactly sure when, but I think it was about the middle of June, Mr. Bug knocked the butter dish {the everyday one, not the fancy one that matches my china} off the end of the counter. It was an accident, but our tile floors are not the least bit forgiving and anything that falls on them breaks. So it was with the butter dish.
I put “butter dish” on my grocery list and the next time I went shopping at the big blue box store, I looked for one. The shelf was empty. The was a little price sticker saying that butter dishes were $3.97, but there were no butter dishes. I circled “butter dish” on my list, as I do with things I can't find or they are out of, so I'll remember to put them on the next list. A week {or maybe two—I'm foggy on the details at this point} later I went shopping at the big blue box store. “Butter dish” was on the top of my list, but the shelf was still empty. There happened to be an associate on the aisle and she asked me if I needed help finding something. I told her I was looking for a butter dish, but there were none there. She kindly scanned the price sticker on the shelf and told me that they had six in stock, but perhaps they hadn't been brought out from the back yet. I thanked her and circled “butter dish” on my list. Again. I have been repeating this little ritual three or four times a month since then, and the spot where the butter dishes are supposed to be is always empty.
I am a creature of habits. As much as I hate the big blue box store, I still shop there because I mostly know where everything is and I can buy jeans for the kids, oil for the car, fabric and groceries all in one stop. I really hate running all over the place to get everything I need, so the convenience of having it all in one place supersedes the several annoyances that come with a large and spacious building that sells anything you could need. Also, I really hate driving anywhere that takes more than 10 minutes to get to. The nearest locale which may have a butter dish is between 20 and 25 minutes away, depending on traffic. I don't like to drive across town. Even for fabric. But I'm beginning to think that we'll never have another butter dish unless I shop somewhere else.
Or maybe I can hold out just until they do inventory and they find out that they in fact do not have six butter dishes in stock and order some more in.
Magic Starch
I'm big on washing fabrics before I use them. Because most of what I buy is 100% cotton, that means it needs a good pressing before I use it. I like to use a little starch, which makes exact cutting easier and the blocks press out better as you put them together. It also keeps the fraying down. My friend, Angie, gave me this recipe a long time ago. I never got around to trying it because procuring the necessary ingredients required driving all over town, which, as you might know, I'm not a big fan of. So Angie sent me some. She actually made some up, put it in a recycled 1-liter bottle and mailed it pretty much across the entire country to me. And I love it! The stuff is liquid gold! Fabric presses up like new. I've been using it carefully, because when I've used up the stuff she sent, I'm going to have to drive all over town so I can make my own. I'm sharing the recipe with you. Try it. You'll thank me later.
Magic Starch
2 cups distilled water
2 oz vodka
10-15 drops pure essential oil of lavender
⅛-¼ cup liquid Sta-Flo® liquid starch {ironically, available at Wal-Mart}
• Combine all ingredients. Put in a fine misting spray bottle and spray on fabrics before pressing.
Notes:
• Recommended for cotton fabrics. Synthetic fabrics may stain due to the oil in the mix.
• Shake before each use to make sure the ingredients are mixed well.
• Use the cheapest not-really-fit-for-human-consumption vodka you can find with the highest proof available.
• Vodka is an emulsifier for the oils as well as a preservative which will help keep the starch fresh over time.
• Vodka is recommended because it has no additives and dries quickly. Rubbing alcohol can be substituted, but some recommend against it because of its toxicity.
• You can mix other oils, such as peppermint, jasmine, chamomile, bergamot or sage to enhance the smell, but make sure to only use clear oils so you don't stain your fabrics.
• Tap water contains chlorine which will destroy the essential oils, so do not use it.
• If you leave out the starch it makes a great linen water to use in your iron.
Monday Music Spot: Total Eclipse of the Heart
A little something funny, especially if you lived through the ‘80s.
Tags:
Humor,
Music,
Pop Culture,
Recipes,
Various and Sundry Monday
Friday, September 30, 2011
Favourite Things Friday: Fall Cooking
Harmony makes small things grow; lack of it makes great things decay. –Sallust
While I'd like to deny it, it is officially fall. Fall is kind of a mixed bag for me. The days get shorter and winter's arrival is inevitable. But the leaves turn beautiful colors and the days are cooler. Fall has a certain a feel in the air. Fall means sweaters and soft fluffy socks and soups. There is something about a nice hearty bowl of soup on a fall evening. I've been hankering for fall cooking all summer. I want to share a couple of my favorite soup recipes with you today.
But first, there are a few good weeks of zucchini left. I put together a collection of zucchini recipes with the help of the ladies in my neighborhood. Click on the cookbook cover to be taken to a downloadable PDF version of the cookbook. To print the booklet, print the file out on both sides of the paper {if your printer won't do it automatically, print odd pages first, flip the pages and arrange so that the first page is on top, printed side down, and so forth. Then print the even pages}. Fold down the middle and you've got lots of new recipes to try.

And now for some yummy soup recipes.
Baked Potato Soup
4 medium baked potatoes
2 slices bacon
¼ cup onion, finely chopped
1 garlic clove, minced or pressed
2 cups hot water
2 chicken bouillon cubes or 2 teaspoons bouillon crystals
1½ cups milk
½ cup celery, chopped
½ teaspoon salt
¼ teaspoon pepper
1 cup sour cream
½ cup {2 oz.} shredded cheddar cheese
• Remove the skins from the baked potatoes. In a medium mixing bowl, mash two of the potatoes. Dice the remaining two potatoes.
• Use kitchen shears to snip bacon into small pieces. In a 4-quart saucepan, cook bacon over medium heat until crisp. Remove bacon to a paper towel to drain. Discard all but 1 teaspoon of the bacon drippings in the pan.
• Add the onion and garlic to the bacon grease in the pan; saute until onions turn clear; add hot water, bouillon, milk, celery, salt and pepper to the onions and garlic in the pan. Bring to a boil; reduce heat and simmer for 10 minutes.
• Stir sour cream and reserved bacon into the soup. Serve topped with shredded cheddar cheese.
Serves 4
Chicken Soup
½ lb. boneless, skinless chicken breast, cooked and shredded
½ cup onion, finely chopped
1 garlic clove, minced or pressed
9 chicken bouillon cubes or 3 tablespoons bouillon crystals
8 cups hot water
2 cups {about 4} carrots, peeled and sliced
1½ cups {about 3 pieces} celery, diced
2 cups {about 2 medium} potatoes, peeled and diced
⅛ teaspoon pepper
1 tablespoon cornstarch
3 tablespoons cold water
• Heat oven to 350˚. Place chicken in a small baking dish and sprinkle with a little bit of salt and pepper. Bake for 30-35 minutes — just until chicken is not longer pink in the middle. Refrigerate chicken completely cool. Once chicken has cooled, shred.
• Place about ½ cup water in a 4-quart saucepan. Add onions and garlic and bring to a boil; simmer until onions turn clear.
• Add remaining water, bouillon crystals, carrots, celery, potatoes and pepper. Bring to a boil and simmer for about 20 minutes.
• Add shredded chicken to the soup. Dissolve cornstarch in cold water and stir into the soup {for thicker soup, double the amount of cornstarch}.
Serves 6
Notes:
• Add a small {6 oz.} can of corn with other vegetables, if desired.
• If you are going to add dumplings to the soup {highly recommended}, stir the soup until the bouillon has dissolved completely, but do not simmer for 20 minutes or the vegetables will be too soft. Bring to a boil, add the chicken and cornstarch, reduce to a simmer and then add the dumplings and proceed as directed in the recipe {at the bottom of this post}.
Beef Stew
½ lb. beef stew meat
½ cup onion, finely chopped
1 garlic clove, minced or pressed
9 beef bouillon cubes or 3 tablespoons bouillon crystals
8 cups hot water
2 cups {about 4} carrots, peeled and sliced
1½ cups {about 3 pieces} celery, diced
2 cups {about 2 medium} potatoes, peeled and diced
¼ teaspoon pepper
1 tablespoon cornstarch
3 tablespoons cold water
• Place a small amount of olive oil in a 4-quart saucepan. Add beef, onions and garlic and cook over medium-high heat until beef is browned.
• Add remaining water, bouillon crystals, carrots, celery, potatoes and pepper. Bring to a boil and simmer for about 20 minutes.
• Dissolve cornstarch in cold water and stir into the soup {for thicker soup, double the amount of cornstarch}.
Serves 6
Notes:
• Instead of using stew meat, this recipe is great for using up left-over pot roast. Just cut your left-over meat into cubes and put them in the pot when you add the water, bouillon and vegetables. If you have left-over gravy, throw that in too, decreasing the water by a cup or two and the bouillon by a cube or two, depending on how much gravy you have.
• Add a small {6 oz.} can of corn with other vegetables, if desired.
• If you are going to add dumplings to the stew {highly recommended}, stir the stew until the bouillon has dissolved completely, but do not simmer for 20 minutes or the vegetables will be too soft. Bring to a boil, add cornstarch, reduce heat to a simmer and then add the dumplings and proceed as directed in the recipe {at the bottom of this post}.
Dumplings
2 cups Bisquick baking mix
⅔ cup milk
• In a medium mixing bowl, combine baking mix and milk.
• Drop by tablespoons over bubbling stew. Cover and simmer for 10 minutes.
• Remove cover and simmer 10 minutes more.
Makes about 10 dumplings
Notes:
• Bring stew to a boil, making sure bouillon has dissolved, but do not simmer stew before adding dumplings.
• Substitute a homemade biscuit recipe if desired.
Today's post brought to you by:

While I'd like to deny it, it is officially fall. Fall is kind of a mixed bag for me. The days get shorter and winter's arrival is inevitable. But the leaves turn beautiful colors and the days are cooler. Fall has a certain a feel in the air. Fall means sweaters and soft fluffy socks and soups. There is something about a nice hearty bowl of soup on a fall evening. I've been hankering for fall cooking all summer. I want to share a couple of my favorite soup recipes with you today.
But first, there are a few good weeks of zucchini left. I put together a collection of zucchini recipes with the help of the ladies in my neighborhood. Click on the cookbook cover to be taken to a downloadable PDF version of the cookbook. To print the booklet, print the file out on both sides of the paper {if your printer won't do it automatically, print odd pages first, flip the pages and arrange so that the first page is on top, printed side down, and so forth. Then print the even pages}. Fold down the middle and you've got lots of new recipes to try.

And now for some yummy soup recipes.
Baked Potato Soup
4 medium baked potatoes
2 slices bacon
¼ cup onion, finely chopped
1 garlic clove, minced or pressed
2 cups hot water
2 chicken bouillon cubes or 2 teaspoons bouillon crystals
1½ cups milk
½ cup celery, chopped
½ teaspoon salt
¼ teaspoon pepper
1 cup sour cream
½ cup {2 oz.} shredded cheddar cheese
• Remove the skins from the baked potatoes. In a medium mixing bowl, mash two of the potatoes. Dice the remaining two potatoes.
• Use kitchen shears to snip bacon into small pieces. In a 4-quart saucepan, cook bacon over medium heat until crisp. Remove bacon to a paper towel to drain. Discard all but 1 teaspoon of the bacon drippings in the pan.
• Add the onion and garlic to the bacon grease in the pan; saute until onions turn clear; add hot water, bouillon, milk, celery, salt and pepper to the onions and garlic in the pan. Bring to a boil; reduce heat and simmer for 10 minutes.
• Stir sour cream and reserved bacon into the soup. Serve topped with shredded cheddar cheese.
Serves 4
Chicken Soup
½ lb. boneless, skinless chicken breast, cooked and shredded
½ cup onion, finely chopped
1 garlic clove, minced or pressed
9 chicken bouillon cubes or 3 tablespoons bouillon crystals
8 cups hot water
2 cups {about 4} carrots, peeled and sliced
1½ cups {about 3 pieces} celery, diced
2 cups {about 2 medium} potatoes, peeled and diced
⅛ teaspoon pepper
1 tablespoon cornstarch
3 tablespoons cold water
• Heat oven to 350˚. Place chicken in a small baking dish and sprinkle with a little bit of salt and pepper. Bake for 30-35 minutes — just until chicken is not longer pink in the middle. Refrigerate chicken completely cool. Once chicken has cooled, shred.
• Place about ½ cup water in a 4-quart saucepan. Add onions and garlic and bring to a boil; simmer until onions turn clear.
• Add remaining water, bouillon crystals, carrots, celery, potatoes and pepper. Bring to a boil and simmer for about 20 minutes.
• Add shredded chicken to the soup. Dissolve cornstarch in cold water and stir into the soup {for thicker soup, double the amount of cornstarch}.
Serves 6
Notes:
• Add a small {6 oz.} can of corn with other vegetables, if desired.
• If you are going to add dumplings to the soup {highly recommended}, stir the soup until the bouillon has dissolved completely, but do not simmer for 20 minutes or the vegetables will be too soft. Bring to a boil, add the chicken and cornstarch, reduce to a simmer and then add the dumplings and proceed as directed in the recipe {at the bottom of this post}.
Beef Stew
½ lb. beef stew meat
½ cup onion, finely chopped
1 garlic clove, minced or pressed
9 beef bouillon cubes or 3 tablespoons bouillon crystals
8 cups hot water
2 cups {about 4} carrots, peeled and sliced
1½ cups {about 3 pieces} celery, diced
2 cups {about 2 medium} potatoes, peeled and diced
¼ teaspoon pepper
1 tablespoon cornstarch
3 tablespoons cold water
• Place a small amount of olive oil in a 4-quart saucepan. Add beef, onions and garlic and cook over medium-high heat until beef is browned.
• Add remaining water, bouillon crystals, carrots, celery, potatoes and pepper. Bring to a boil and simmer for about 20 minutes.
• Dissolve cornstarch in cold water and stir into the soup {for thicker soup, double the amount of cornstarch}.
Serves 6
Notes:
• Instead of using stew meat, this recipe is great for using up left-over pot roast. Just cut your left-over meat into cubes and put them in the pot when you add the water, bouillon and vegetables. If you have left-over gravy, throw that in too, decreasing the water by a cup or two and the bouillon by a cube or two, depending on how much gravy you have.
• Add a small {6 oz.} can of corn with other vegetables, if desired.
• If you are going to add dumplings to the stew {highly recommended}, stir the stew until the bouillon has dissolved completely, but do not simmer for 20 minutes or the vegetables will be too soft. Bring to a boil, add cornstarch, reduce heat to a simmer and then add the dumplings and proceed as directed in the recipe {at the bottom of this post}.
Dumplings
2 cups Bisquick baking mix
⅔ cup milk
• In a medium mixing bowl, combine baking mix and milk.
• Drop by tablespoons over bubbling stew. Cover and simmer for 10 minutes.
• Remove cover and simmer 10 minutes more.
Makes about 10 dumplings
Notes:
• Bring stew to a boil, making sure bouillon has dissolved, but do not simmer stew before adding dumplings.
• Substitute a homemade biscuit recipe if desired.

Friday, August 19, 2011
Favourite Things Friday: Zucchini
Zucchini's terrific!
Like bunnies, prolific!
–Unknown
I love this time of year. All the home-grown produce is ripening up and everything just tastes better when it is fresh from the garden. Although I'm not a huge fan of vegetables, for some strange reason I have adopted zucchini as a summer cooking staple. I just think it adds something delicious to any dish. Lately, we've been enjoying lots of really yummy zucchini dishes and we'll continue enjoying them as long as I can get my hands on zucchini fresh from the garden. Tonight, we had Two-Bean Chicken Chili. It was so good. I dug through the archives and here are links to all my favorite zucchini recipes, so if you like zucchini {or even if you don't; you might if you try these recipes} you can try a new dish or two.
Italian Chicken Pasta Toss
Meatloaf
Minestrone
Two-Bean Chicken Chili
Zucchini and Cheese Soup
Zucchini and Chicken Bake
Zucchini, Chicken and Rice Casserole
Today's post brought to you by:

Like bunnies, prolific!
–Unknown
I love this time of year. All the home-grown produce is ripening up and everything just tastes better when it is fresh from the garden. Although I'm not a huge fan of vegetables, for some strange reason I have adopted zucchini as a summer cooking staple. I just think it adds something delicious to any dish. Lately, we've been enjoying lots of really yummy zucchini dishes and we'll continue enjoying them as long as I can get my hands on zucchini fresh from the garden. Tonight, we had Two-Bean Chicken Chili. It was so good. I dug through the archives and here are links to all my favorite zucchini recipes, so if you like zucchini {or even if you don't; you might if you try these recipes} you can try a new dish or two.
Italian Chicken Pasta Toss
Meatloaf
Minestrone
Two-Bean Chicken Chili
Zucchini and Cheese Soup
Zucchini and Chicken Bake
Zucchini, Chicken and Rice Casserole

Wednesday, June 22, 2011
The Best Barbecue West of Wherever They Have Really Great Barbecue
Give a man some barbecue and feed him for a day. Teach a man to barbecue and feed him for the summer. –Unknown
This is one of our favorite barbecue recipes. I made it for Father's Day and it was so good, I skipped the photo op so I could get down to eating.
Barbecue Sauce
1 cup ketchup
¼ cup onion, finely chopped
¼ cup apple cider vinegar
¼ cup molasses
2 tablespoons Worcestershire sauce
2 teaspoons chili powder
2 cloves garlic, minced or pressed
• Combine ketchup, onion, vinegar, molasses, Worcestershire, chili powder and garlic in a medium saucepan.
• Bring to a boil over medium heat, stirring occasionally; reduce heat and simmer for 10 to 15 minutes.
• Store in the refrigerator.
Makes 2 cups
Notes:
• Use with beef, chicken or pork.
• For grilling, brush on meat during the last 5 minutes of cooking; serve with extra sauce on the side for dipping.
• Mix sauce with shredded chicken or beef or pulled pork for great barbecue sandwiches.
• For baking, see below.
Barbecue Ribs
2 lbs. country-style boneless ribs {beef or pork}
2 cups barbecue sauce
• Heat oven to 275˚. Place meat in the bottom of a baking dish. Pour sauce over meat and cover baking dish.
• Bake, covered, for 3 to 4 hours.
• Serve with garlic mashed potatoes or baked potatoes, veggie of choice and fresh watermelon.
Serves 4
Notes:
• For baked barbecue chicken, bake at 350 for 35 to 45 minutes {until chicken is no longer pink}.
• For large groups, use a ratio of 1 cup sauce to 1 pound meat.
I made strawberry shortcake for Mother's Day and meant to post the recipe a while back. Since I'm sharing great food that makes days to celebrate the special people in our lives a little bit more special, I'll throw this one in too. We celebrated Mother's Day with Mr. Bug's family. I estimated that there would be about 40 people there. I think there were 38. To make sure I had enough for everyone, I used 3 dozen eggs and 10 pounds of strawberries. It was quite a party.
Angel Food Cake
1½ cups egg whites {10 to 12 large eggs}
1½ cups sifted powdered sugar
1 cup sifted flour {cake or all-purpose}
1½ teaspoons cream of tartar
1 teaspoon vanilla
1 cup granulated sugar
• In an extra-large mixing bowl, allow egg whites to stand at room temperature for 30 minutes. Meanwhile, sift powdered sugar and flower together 3 times; set aside.
• Add cream of tartar and vanilla to egg whites. Beat with an electric mixer on medium speed till soft peaks form {tips curl}. Gradually ad sugar, about 2 tablespoons at a time, beating till stiff peaks form {tips stand straight}.
• Sift about one-fourth of the dry mixture over the beaten egg whites; fold in gently. Repeat, folding in remaining dry mixture by fourths. Pour into an ungreased 10" tube pan. Gently cut through batter to remove any large air pockets.
• Bake on the lowest rack in a 350˚ oven for 40 to 45 minutes or till top springs back when lightly touched. Immediately invert cake {leave in pan}; cool thoroughly. Loosen sides of cake from pan; remove cake.
Serves 12
Notes:
• The recipe calls for a tube pan, but I used a Bundt pan instead and it came out just fine.
• The powdered sugar and flour are sifted no less than five times; remember to sift them before you measure them.
• When you turn your cake, if it is too high to set the pan down, use the built-in legs on the pan. If you didn't use a tube pan {or it doesn't have legs}, invert over a metal funnel or a glass bottle with a slim neck. If you don't have a glass bottle or a metal funnel, you can get creative and use books of equal height tucked just under the rim of the pan to prop it up so you don't squish the cake while it cools, hanging upside down.
• For chocolate Angel Food Cake, add ¼ cup unsweetened cocoa powder when sifting powdered sugar and flour together.
Strawberry Shortcake
3 lbs. fresh strawberries
3 tablespoons sugar
• Wash strawberries and remove stems. Cut strawberries in quarters {or more, for larger berries} vertically. Sprinkle with sugar and gently stir to coat. Refrigerate for at least 1 hour {up to overnight}.
• Stir strawberries before serving; serve over Angel Food Cake, topped with whipped cream.
Serves 12
Notes:
• For more {or less} strawberries, use a ratio of 1 tablespoon sugar to 1 lb. of strawberries.
• If you're going to go to all the trouble of baking an Angel Food Cake from scratch, you darn well better make the whipped cream too {instructions on container of cream}. It just tastes better. Unless, of course, you're dairy-free in which case you'd just leave it off all together.
Saturday, June 4, 2011
The Whole Enchilada
Food for thought is no substitute for the real thing. –Walt Kelly
Mexican food is one of my favorites, so I thought I'd share a couple of our favorite chicken enchilada recipes. The first one is my favorite and the second one is Mr. Bug's.
Chicken Enchiladas
2 lbs. boneless, skinless chicken breasts
1 {15 oz.} can Mexican stewed tomatoes
8 tortillas
1 {11 oz.} can enchilada sauce
1 {11 oz.} can cream of chicken soup
½ c. Monterey Jack cheese, grated
• Heat oven to 350˚. Place chicken in a baking dish, sprinkle with a little salt and pepper, cover and bake for 35 minutes. When chicken has finished baking, wrap in foil and refrigerate until completely cooled.
• Shred the chicken. Put the tomatoes in the blender or food processor and chop until the consistency of salsa. Mix chicken with tomatoes.
• Place the chicken mixture onto the tortillas; microwave each tortilla for 15-20 seconds and then roll the enchiladas and place in a 9x13 baking dish.
• Mix enchilada sauce and soup together; pour over the enchiladas in the baking dish; top with cheese. Bake, uncovered, at 350˚ for 30 minutes.
• Serve with Spanish rice and refried beans.
Serves 6 to 8
Notes:
• If you bake the chicken too long {i.e. long enough for all the juices to evaporate} the chicken will be dry. Bake it just until chicken is no longer pink in the middle. Allow it to cool completely {in the fridge} before cutting to allow for more flavorful, juicy chicken.
Creamy Chicken Enchiladas
2 lbs. boneless, skinless chicken breasts
1 medium onion, finely chopped
1 cup hot water
1 chicken flavored bouillon cube
1 {4 oz.} can chopped green chiles
8 tortillas
1 {8 oz.} container plain yogurt
1 {11 oz.} can cream of chicken soup
1 c. Mozzarella cheese, grated
• Heat oven to 350˚. Place chicken in a baking dish, sprinkle with a little salt and pepper, cover and bake for 35 minutes. When chicken has finished baking, wrap in foil and refrigerate until completely cooled.
• Shred the chicken. Dissolve the bouillon cube in the hot water. Place the chopped onions and ¾ cup of the chicken broth in a small skillet and sauté until the onions are clear and no liquid remains.
• Combine the chicken, onion and green chiles. Reserve half of the cheese. Place a little bit of cheese onto the tortillas. Place the chicken mixture on top of the cheese; microwave each tortilla for 15-20 seconds and then roll the enchilada and place in a 9x13 baking dish.
• Mix the yogurt and soup together; pour over the enchiladas in the baking dish; top with cheese. Bake, uncovered, at 350˚ for 30 minutes.
• Serve with Spanish rice and refried beans.
Serves 6-8
Notes:
• You may substitute 8 oz. sour cream for the yogurt.
Tags:
Recipes
Tuesday, May 3, 2011
I Did Not Win A New Sewing Machine
As a child my family's menu consisted of two choices: take it or leave it. –Buddy Hackett
Last month, one of my favorite LQS's was giving away a sewing machine. A sewing machine I really want. The first day I went in there to enter I asked how many entries were allowed per person. They told me that you could enter once a day if you wanted. Since I work just two blocks from this quilt shop, I stopped by to enter the drawing on as many days as I could. Car trouble kept me from entering on about five different days, but I think that I filled out an entry 13 or 14 times out of a possible 26. The entry period ended on Saturday and I called yesterday to find out when the winner would be announced. They told me they would call the winner today. Since the only message on my phone when I got home from work was from the mother of a student in Grasshopper's class about a report they are working on together, I think I can safely assume that I was not the winner. Oh, well. You can't miss what you never had, right?
In place of winning a new sewing machine today, something that would only benefit me, I decided that sharing something that would benefit others might be a nice idea. How about a recipe?
Cheesy Chicken, Broccoli & Rice Casserole
½–¾ lb. boneless, skinless chicken breasts
2 tablespoons olive oil
¼ cup finely chopped onion
1 garlic clove, pressed or minced
1½ cups uncooked white rice
3 cups hot water
¾ teaspoon salt
2 medium-large heads of broccoli
1 can {10¾ oz.} condensed cheddar cheese soup
1 cup milk
½ lb. cheddar cheese, shredded
• Heat oven to 350˚. Place chicken in a baking dish, sprinkle with a little salt and pepper, cover and bake for 35 minutes. When chicken has finished baking, wrap in foil and refrigerate until completely cooled. Cube chicken.
• In a 3-quart saucepan, heat olive oil over medium-high heat; sauté onions and garlic until onions begin to turn clear.
• Add rice to the garlic and onions in the pot and heat for 2–3 minutes, stirring occasionally.
• Add the hot water and salt to the rice and bring to a boil. Cover and reduce heat to low; simmer for 25 minutes.
• While the rice is cooking, cut the broccoli into bite-size pieces; place in a covered, vented, microwave-safe dish, sprinkle with a little salt and add about ¼ cup water. Microwave on high for five minutes.
• In a medium mixing bowl, combine cheese soup and milk until smooth. Stir the cubed chicken and about a third of the cheddar cheese into the soup mix. Drain any excess water from the broccoli.
• Heat oven to 350˚. Place the rice in a 9" x 9" baking dish. Add the broccoli and cheese soup mixture and stir to combine. Distribute the casserole evenly in the baking dish and top with remaining cheddar cheese. Bake for 30 minutes, uncovered.
Serves 4–6
Tags:
Goofy Post Titles,
Recipes
Subscribe to:
Posts (Atom)