Showing posts with label Ph.D Quilts. Show all posts

Thursday, November 14, 2013

The Galloping Horse Method

We can complain because rose bushes have thorns, or rejoice because thorn bushes have roses. –Abraham Lincoln

I am slightly OCD. Obsessive Creative. Obsessive Compulsive. Potato, potahto, right? I tend to get wrapped up in the details and rather than seeing the big picture, I focus on all the tiny imperfections. I guess you could say I'm an imperfectionist. And I let myself be limited by all the things I can't to. I've been thinking about this on and off for a while now. Yesterday, as I was pondering the complexities of stripey binding, my sister reminded me that shifting your perspective opens up a lot of previously unexplored possibilities. She said, I don't know much about binding, but I think I'd take the longer lasting way even if it doesn't lay perfectly straight. Use the galloping horse method to determine how picky you're going to be.

And what is the galloping horse method, you ask? The story goes like this. I took a beginning machine quilting class in February of 2010. The teacher talked about how to determine if you're going to unpick. She said that if you were to pass by the quilt on a galloping horse and you could see the mistake, then unpick.

Several thoughts sprouted from this reminder.
  1. Just do your best and let the stitches fall where they may.
  2. Not every quilt has to be a show quilt.
  3. Focus on what you can do and not on what you can't.
Do your best and let the stitches fall where they may.
I can do bias binding. I know it. I love it. So that's what I did. And I'm pretty darn excited about those formerly diagonal vertical stripeys. It's not perfect. Some of my seams matched up better than others. It might turn out a tiny bit ripply, as my bindings always do. But then again, it might not. In order to get enough binding out of the piece of fabric I had, I made it 2⅛" wide instead of 2¼". Perhaps being a fraction of an inch narrower will give it more fill once it is turned and might, just might, solve the pucker problem.

Not every quilt has to be a show quilt.
As a matter of personal preference, I like quilts that are "custom." I always have. When I piece a quilt, I pick the design because I like it and I want all that work to be shown off to its best advantage by the quilting. I think edge-to-edge tends to mask the piecing. But with no small amount of internal debate, I took this quilt and the one before it to the quilt fairy to be done edge-to-edge. Having them done in time to give as birthday gifts outweighs spending weeks on quilting the perfect design in them. These quilts are meant to be snuggled under and dragged around and picnicked on at washed and used and loved. Masterpiece quilting doesn't quite fit the bill, here.

Focus on what you can do and not on what you can't.
I kind of like having a quilt fairy. It means there are a lot of things I can do instead of making myself crazy trying to cram 40 hours of quilting into an already packed week. While my quilt is being professionally quilted {with a stitch regulator!}, I can spend time helping the Not-So-Little Bugs with homework and projects. I can catch up on the laundry. And the dusting. And the bathrooms. I can cook actual dinners instead of sentencing the family to cold cereal and ramen for a week straight. I can go to bed at a decent time. And I can be completely wowed by an edge-to-edge quilting design. Here's a peek.

You'll be even more wowed when I show you the whole quilt. With stripey binding. And a completely awesome embroidered quilt label. It's one of my best, if I do say so myself.

Wednesday, November 13, 2013

Directional

Aye, the compass doesn't point north, but we're not trying to find north, are we? –Mr. Gibbs, Pirates of the Caribbean: Curse of the Black Pearl

I finished my Drunkard's Path quilt top. I didn't take pictures because I was in a rush to drop it off for quilting. It pretty much looks like this. Only all sewn together. With a couple of borders. Which may or may not work.

The top is made from Kona Solids {don't ask which colors} and coordinates from Marcus Brother's Metro Blue fabric line. It is an old print {2006, reprinted in 2009} but I really love the colors and I think it still looks pretty modern. Ish. I saved the best print for the binding.

Stripey fabrics are meant to be used as bindings. I always do bias-binding {bias is so fancy}, which means that the stripeys come out diagonally. Unless the stripeys are already printed on the diagonal. Which these are. The question is, then, do I do a regular old cut-on-the-grain binding so that the stripeys stay diagonal? Or do I do a bias binding, which would make the stripes come out vertically along on the edge of the quilt? I've seen a lot of cute vertically striped bindings lately.

The cons are these:
On-grain binding:
• Since the binding is cut along the grain, the fold creates more stress in the fabric and after only a few washings the binding starts to turn white along the folded edge. After years of use, the fabric can split open at the fold because the stress is put on a narrow, continuous area of the fabric's weave.
• Piecing seven separate diagonal seams to make a piece of binding long enough to go around the quilt.

Bias Binding:
• I can never get a bias binding to lay perfectly flat and smooth, no matter how carefully I watch my 45° degree angle or how much pressing and pinning I do. It always lies a little puckered.

The pros are these:
On-grain binding:
• Super cute diagonal stripes around the border.

Bias Binding:
• Fast and easy continuous piecing.
• The stress of the fold is distributed diagonally across the weave of the fabric, prolonging the wear of the binding.
• Super cute horizontal stripes around the border.

The quilt is finished and ready for pick-up. I'm excited to see how the quilting came out. I'll either go get it tonight, if Melissa has time, or tomorrow morning. This means it is time to decide how to cut my binding. Suggestions welcome and appreciated!

Monday, October 28, 2013

This Quilt Needs A Name

The difference between the almost right word and the right word is . . . the difference between the lightning bug and the lightning. –Mark Twain

I've been puttering around off and on with an old Ph.D Quilt for the last several weeks whenever I wanted to avoid what I should really be doing. I cut the fabric almost exactly three years ago, not long after I won my Go! Fabric Cutter, using the large Drunkard's Path die. Recently, I sewed the curved pieces to their corners, squared them all up, laid them out and then stacked them row by row to be put away until I don't have so many other projects going on all at once. They've been sitting in my sewing area for over a week.

Before I can put my little stacks away, I need some help with a name for the quilt. How about a little back-story to go with that request? Yes? Great. Early in 2010, I bought half-yard cuts of six of the prints from a line of fabric called Metro Blue to make a wedding gift for a neighbor using her wedding colors and left over fabric from her wedding dress.

The framed Double Wedding Ring only took a little bit of the fabric, and the rest just seemed perfect for a Drunkard's Path quilt. And the fabrics and colors seemed perfect for a particular friend and neighbor. Her birthday is coming up in mid-November and I want to try and finish this quilt in time for that. I'll be calling on Melissa at Sew Shabby Quilting to help with the machine quilting again. If I get on the ball and finish Grasshopper's Halloween costume, I can get it to Melissa early enough to avoid a rush fee and still leave myself plenty of time to bind it. {And we're all rolling our eyes and shaking our head here, me most of all, because I'm imposing another crazy deadline on myself.}. Anway, I saved the stripey print for the binding {because stripey and binding go together like peanut butter and jelly} and cut the rest into enough pieces to make a nice throw-size quilt.

But, let's face it. That layout is a bit of a snooze-fest. It's not every very pretty. And it does not inspire a name. At all. I've been thinking about it every now and again for the past three years and I've got nothing. Zip. Zero. Nada. Not even the name of the fabric line, Metro Blue, works. So I tried something different.

The name of this Drunkard's Path design is Love Rings. But Love Rings isn't a name for a friendship quilt. I want the name to reflect the kind of person this friend is. She is kind to everyone, thoughtful, considerate and one of those people who quietly serves and never asks for thanks or recognition. Her husband's job takes him on frequent business trips. In addition, he has quite a busy volunteer job at church. While the work he does is of huge benefit to many, many people, I know it is hard for her to not have him there sometimes. I wanted to do a little something special for her to let her know that I appreciate everything she does and am grateful to have her as a friend. When I think of her, I think of this little poem by Edwin Markham:

There is a destiny which makes us brothers;
None goes his way alone.
All that we send into the lives of others
Comes back into our own.

But I'm having a hard time fitting all that into a single word or phrase that will fit nicely on a little embroidered label for the back of the quilt. I've thought of a few names, like Reciprocity, but the sentiment "you scratch my back and I'll scratch yours" really isn't right. Calling the quilt What Goes Around Comes Around isn't really much better, and I don't believe in Karma, per se, although I do believe that every action has an Equal and Opposite Reaction. I thought about Ripples, which seems to work a bit better than the others. The quilt kind of looks like water rippling out. But I'm not sure about that either. I'm just about ready to call it Quilt With No Name, but I've been humming that song by America and a quilt name that inspires incessant humming of a melancholy tune from the 1972 just doesn't cut it, in my book.

If you've got a suggestion for what to call this quilt, I'd love to hear it! And while you're at it, I'd love to hear opinions on what panto to have Melissa quilt in it. I've got my eye on Belly Bop, Loops and Swirls, Van Gogh, Swirls, Rose Leaves and Retro Leaves.

Decisions, decisions.

Tuesday, August 13, 2013

South for the Winter

Give thanks for what you are now, and keep fighting for what you want to be tomorrow. –Fernanda Miramontes-Landeros

Since July 4th I've been puttering around with my Patriotic Sampler. This is a project I started before LadyBug was born {which was 11½ years ago. Can she be that old already?} and is my second oldest Ph.D {Project Half-Done}. I keep thinking I need to put it away and work on something else, but there is always another something fun to tinker with on this quilt. I put together 120 flying geese for the outer border. I geese. And I this no waste method for flying geese.

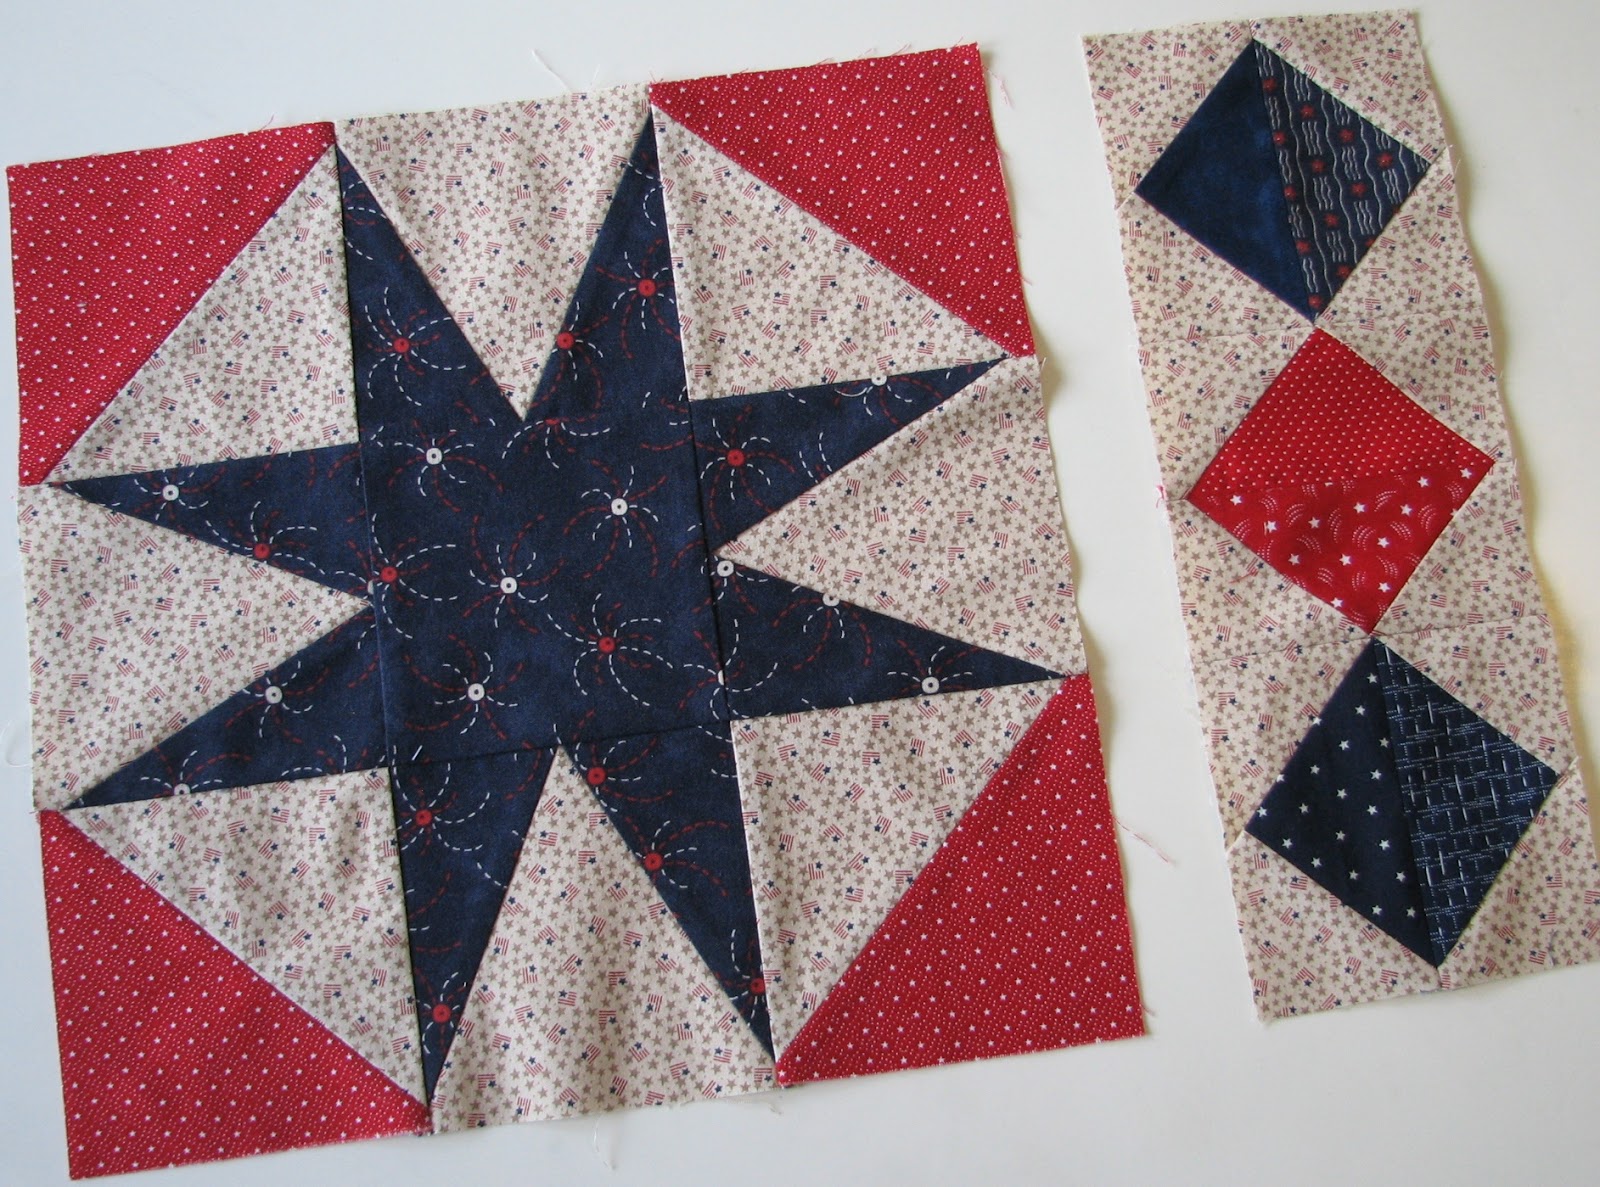
I also made the transition pieces for the centers of the flying geese border. When I originally planned it, I'm pretty sure I envisioned diamonds {square in a square} at the center of each side between the geese. But because I didn't write my plans down anywhere, I had to come up with it twice. When I finally added the border to my layout graphic, I put in alternating strips of red and blue to bridge the gap between the different colors of geese. But once I had my strip sets sewn, I knew they needed to be diamonds rather than squares/rectangles.

I scanned the blocks and added them in to my layout. I really like how the diamonds look {compare to the previous incarnation}.

I forgot math while I was working on my border centers and accidentally made the ones for the sides too long. It took me for. ev. er. to get the background triangles in the corners right. I only discovered the blocks were too long when I went to square them up. But aren't they pretty?

Anything that I went to that much trouble to make does not end up in the discard bin. I decided to use them as a part of one of the place mats. {Backstory: I have this huge blank wall in my kitchen. I want to make a quilt for every month to display there, and have coordinating place mats on the table, which is next to the wall.} Place mats are fun, but I think for any future quilts, I'll probably do a table runner instead of place mats. Because no one will eat off these place mats. Ever.

A row of geese on each place mat was the original plan. I really like how it looks. There will be a sashing strip between and a border of the same width all the way around.

Since I used those discarded stripey diamonds on that first place mat, I decided to mix it up a little on some of the other place mats as well.

Another one with a row of geese.

Three diamonds made out of the geese units seemed to fit really well with this block.

And another one with just geese. It was purely coincidental that I ended up with three with rows of geese and three with something different. It was also purely coincidental that I posted them in alternating order.

I love the pretty red, white and blue scrappiness of this project. And I love the tan that ties everything together.

I started to put sashings on the quilt blocks for the top. Here it is on my living room floor up on my design wall. I debated about whether to just go ahead and put the top together, but I still need to finish eight of those tiny paper pieced five-point stars {I made three more since my last report} that go at the corner of each block. And didn't want the quilt top to sit folded somewhere for the next nine months until I can get to quilting it, so I only put things together insofar as they won't have to be folded when I put them away.

My last bit of puttering was to figure out how to label this puppy. Two of the blocks {The Old Red & Blue and Land of Liberty} are original designs by Marcia Hohn at The Quilter's Cache and her terms and conditions of use stipulate that any original block be credited to her and her site referenced in a permanent manner on the back of the quilt. I picked up ideas and/or patterns for a number of the other blocks from other folks around the internet {credits here}, so in fairness to everyone who creatively contributed, I decided to make a little embroidered label for each block. They are between 1½" and 2" tall and 4" wide. There's also a label with the name of the quilt {This Land Is My Land} and credits to me for piecing, layout and quilting. I'm going to put them together in a strip that will go up the back of the quilt along length of the seam where I join the two pieces of fabric to make it wide enough. I'll add varying lengths of strips of red and blue fabric or left over geese between each embroidered piece. I'll keep the labels in my go bag for hand projects for when I know I'll be sitting and waiting. Hopefully, I'll have them all finished when I'm ready to get this quilt out again and finish it. {Sidebar: LadyBug had her pre-6th grade well-child check the other day. I didn't bring anything to work on because I thought we'd be in and out in a jiffy. The last few times we've been in for other things, I've barely got my project out when they're ushering us out the door. But after 10 minutes in the waiting room, we sat for a full 30 minutes in the exam room before the doctor came in. I think they forgot we were in there because they weren't busy. We entertained ourselves with a rousing game of "I Spy." Lesson learned. Always bring a project. Always.}

I put everything back in the storage tote today. I made myself little notes and put things in separate baggies so that when I get this back out again, I won't have to reinvent. There's not much left to do before I have a flimsy. Eight 5-point paper pieced stars; adding the sashings and corner stones to the blocks, sewing the blocks together, sewing the flying geese border together and adding it to the quilt.

Yes. Next year is definitely the year to get this quilt finished. But for now, the 120 geese {and company} are flying south for the winter.

Saturday, August 3, 2013

Tiny Stars All In A Row

[Miss Tick] said, “Are you listening?”
“Yes,” said Tiffany.
“Good. Now . . . if you trust in yourself . . .”
“Yes?”
“. . . and believe in your dreams . . .”
“Yes?”
“. . . and follow your star . . .” Miss Tick went on.
“Yes?”
“. . . you’ll still be beaten by people who spent their time working hard and learning things and weren't so lazy. Goodbye.”

–Terry Pratchett, The Wee Free Men

Since July 4th, I've been puttering around with my patriotic themed quilt. I finished the last two blocks for the top and then started putting together some tiny 1" paper pieced stars. My little pile has grown from seven to 20 of 31 {27 for the front and four to go on the label on the back of the quilt}.

I also decided to measure my blocks for accuracy. This is one of the first quilts I ever started {it's my second oldest Ph.D} and I knew that some of the blocks were a little off. The blocks I did last year and this were OK, but most of the older blocks needed fixing. Some of them just needed to be taken apart, the pieces squared up and put back together with an accurate ¼" seam allowance. Others, I unpicked, changed out a few fabrics and put back together, and I even completely remade a couple.

I'll probably be moving on to another project soon, but my goal is to have the pieces close to being ready to put together into a quilt top when I get it back out again next year. I'm think I'm done with the stars for now. But I put together the blocks that go in the corners. I love how they came together!

I think I'm going to work on the flying geese a little bit, and then it will be time to put this quilt away for a while. Next year, I will remember to get this out in time to have it finished and displayed for the holiday!

Tuesday, July 9, 2013

Seven Days Without Sewing Makes One Weak

Doldrums: \ˈdōl-drəmz\
Noun
1. a spell of listlessness or despondency
2. a part of the ocean near the equator abounding in calms, squalls, and light shifting winds
3. a state or period of inactivity, stagnation, or slump


Once upon a time, about 2½ weeks ago, I kind of fell into a funk. About six weeks ago, I made a major adjustment to my schedule so that I could be around more for the Not-So-Little Bugs during summer. Overall, it has been a really positive change. I like being the first one in at work. I get a lot more done while it's quiet. And I also get to go home before everybody else; before lunch even. I think, too, that going to bed earlier {it's usually still a little bit light out} and getting more sleep has had a positive effect on how many migraines I get and how long they last {i.e., I'm having fewer and they don't hang on for days}.

I'm trying to keep this as non-whiney as possible, but what this little back-story is leading up to is that somewhere in there, I kind of lost my "me" time. And maybe a little bit of me, too. I know that making sacrifices for your kids is part of being a parent. But I kind of felt like there was a whole lot of resistance in the ranks to where I wanted to go {which, in the literal sense, was anywhere but sitting around at home staring at the screens all day}, getting up early to go to work, going to bed early so I could get up early to go to work, and trying to out-stubborn {in a happy, positive, encouraging kind of way} the reticent {or alternately defiant} Not-So-Little Bugs all combined to make me feel like I was kind of failing a little bit at life. Subsequently, not even sewing sounded fun. So for a few days, I didn't.

Going without sewing for a few days is no big deal. Sometimes you just need a little break. Going a whole week without sewing was kind of a red flag for me. I decided that I'd better get back to the machine and I started to write this post. Well, sort of. I had a clever post title {I puns}. A few more days went by and still no sewing. At around the 11th no-sew day, it became a bit of a game and I decided to see if I could go a full two weeks without sewing. I think that was the turning point and by day 13, I was itching to do something creative. It was the 4th of July and it is kind of my tradition to work on my Patriotic Sampler for a few days every year around this time. {I know. It would make more sense to start working on it in April so it would be finished and ready to display on the 4th.}

I've been working on this sampler for about twelve years now. I started it when I was pregnant with LadyBug. She's eleven. It is my second oldest Ph.D, and I don't know why I don't just finish it already :lol:. I'm so close. Anyway, I decided I'd work on some of the itty, bitty paper pieced stars that go at the corners of the blocks in the sashing. It was then that I found out that my post title was more true than I knew. After the first star {which took an hour because I fussed and fiddled and unpicked a lot to try and get the stripes to line up} I was ready to quit. My sewing muscles {the mental ones that help you push through a boring/difficult/unpleasant part of a project} were seriously out of shape. I persisted, even though I didn't really want to. The non-stripey ones only took thirty minutes each. Seven down. Only twenty more to go.

Cute, no? They finish at 1". Who designed this quilt anyway?
Oh. Right. It was me.

After I'd had my fill of that, I put together one of two remaining blocks for the quilt top. It has been cut out and ready to go for, oh, I don't know. Four years now? This one is called Land of Liberty as was designed by Marcia Hohn at The Quilter's Cache. I kind of love it. Pinwheels and flying geese in the same block? It doesn't get better than that.

For the final block, I had three contenders, only two of which I can remember at the moment, so I won't even bother to tell you about the losers. I showed them to Mr. Bug and he said, hands down, this should be the final block. It is called Spiderweb Star, and it is pretty awesome. {Note: if you make this block, reverse the cutting directions for template piece C/CR.}

I also fiddled around at the old doodle pad {Microsoft Picture Manager & Microsoft Paint} and changed my sashing from tan {the same tan used for most of the block backgrounds. Yeah, not sure what I was thinking there.} to white, moved the blocks around a bit and added the flying geese border. It's kinda wild and crazy. I think it will be a little more mellow with a scrappy collection of reds and blues in the flying geese section. I'm debating about whether or not to add a border between the sashing and the geese and another on the outside of the geese. What do you think?

Block Credits:
Row 1 - left to right
The Old Red and Blue by Marcia Hohn at The Quilter's Cache
Zig-Zag Flag inspired by Karen at The Recipe Bunny
Our Eagle pattern from a BOM my mom did at her LQS

Row 2 - left & right
Glory Flag pattern from a BOM my mom did at her LQS
Crossroads traditional block

Center Section - left to right, top to bottom
Uncle Sam pattern from a BOM my mom did at her LQS
Patriot's Star {modified} at eQuiltPatterns.com
Banner Flag by Elizabeth
US Ribbon at Compuquilt
Pledge of Allegiance Embroidery by Elizabeth

Row 3 - left & right
July Fourth traditional block
54-40 or Fight {modified} or Star Shield traditional block

Row 4 - left to right
Land of Liberty by Marcia Hohn at The Quilter's Cache
Courthouse Steps traditional block
Spiderweb Star at McCall's Quilting

Friday, May 10, 2013

Some Assembly Required

It's not the load that breaks you down, it's the way you carry it.
–Lou Holtz
10 yards of fabric
cut to
252 – 2” Squares
504 – 1½” x 2½” Rectangles
1,260 – 1½” Squares
1,044 Triangles

A little over four weeks ago I dropped Grace off at the Babylock dealer where I bought her for a routine physical. And they happily told me they'd give her a good work-over and have her back to me in three or four weeks. When I got home, I got busy preparing for Grace's return. I pressed open about 600 half-square triangles and unpicked about 300 more, making 600 orphaned triangles. Then I cut buddies for them so they could become half-square triangles again and put them all away in a drawer to wait patiently and dust-free, until I got my machine back.

After that, I started cutting fabrics for another quilt that has been kicking around since late 2007. At least. I pieced triangles {which are actually star points} together here and there until I finally couldn't stand it and chain-pieced the rest together one day a few months ago while I was procrastinating quilting the Zig-Zag quilt. 1,044 triangles showing here:

This quilt started out as four blue fabrics from the Toile Christmas fabric line by Moda. I came upon them at my mom's LQS and stood in the store coming up with a plan to use these fabrics in a quilt for LadyBug's bed so that I could buy them. I was going to make a quilt of maple leaves. Blue maple leaves. I still don't know what I was thinking :confused:, except that I love maple leaves. And this pretty blue fabric.

One day, six or so months later, I came across the instructions for a Checkerblock Star by Marcia over at The Quilter's Cache. And I decided that the blue fabrics would be way more cool in a quilt of Checkerblock Stars.

The only problem was that I didn't have enough of my four Toile Christmas blues to make a whole quilt. 60% of the fabric gets pulled into seam allowances. Enough time had passed that the fabric was all sold out so I visited every quilt shop along a 100-mile stretch of I-15 {which runs North and South through Utah & Nevada. And maybe Idaho.} looking for blues to match those four shades of Toile Chirstmas. Matching the exact tone of these blues was tricky, but in the end I pulled together something passable.

At the time, my eyes had not been opened to the beauty of scrappy quilts and the picture in my head for this quilt was for a smooth, subtle and uniform flow of shades. I was reluctant to break up my original four fabrics and add other fabrics to the mix to give me enough for the quilt I wanted to make. Since then, I've come to love scrappy quilts, but I still waver between thinking this particular scrap quilt is going to be really great and a great big mess. Trying to make this work with four shades of the same color in a single fabric line is a little bit tricky. Trying to make it work with those same four shades but in a of a bunch of different fabrics {34, to be precise} is a little bit crazy.

--

Last Tuesday night, I had all my fabrics cut to finish the rest of this quilt. I was pretty sure that Grace would be ready for me to pick her up on Wednesday, because Wednesdays are pick-up and delivery days for the repair man. Also, three weeks was plenty of time for him to give her a tune-up. By noon on Wednesday, I was too anxious to wait any longer for a call from the shop. I called them, but she was not back yet. I guess she'd heard that I had big plans for her and wanted another week off. Reluctantly, I made a mental list of projects that did not require a machine and worked on a hand sewing project that evening.

On Thursday after work I was sitting at the stop sign on the corner down the street from my house, when the shop called to say my machine was in. I banged my head on the steering wheel several times because if they'd have called just 15 minutes earlier, I could have picked Grace up on my way home. The shop is two blocks from where I work {sidebar: on really frustrating work days, I fantasize about walking down the street and escaping in the bolts of fabric}. On Friday, I actually did leave work in the middle of the day and picked up my machine. And then I pretended I was an adult and went back to work. When I got home on Friday afternoon, Grace and I got right to work.

These are the center sections of each Checkerblock Star; 252 – 2” squares, sewn into 63 – four-patches. I used my Go! cutter and the 2" square die, but there was a little distortion because I tried cutting too many layers at a time. I was about a hundred squares in when I decided that I'd better not try to cut six layers of fabric all at once. They are kind of a mess. Not a single one of them measures the 3½” they should. I'm trying to decide if I should fudge it in the seam allowance when I put the blocks together, or if I should unpick them and sew them back together with a scant scant ¼” seam. If I had any fabric left, I think I would probably start from scratch, but that's not an option.

I strip pieced the rest. These are the outer edges and corners of the blocks, 252 – 1½” squares and 504 – 1½” x 2½” rectangles. Half of the rectangles were pieced to squares and the other half will be added to four-patches made from the remaining 1½” squares. I've only got a few strips left to cut.

These are the rest of the 1½” squares {in the rough}. 1,008 of them. They need cutting into 504 pairs and then sewing into 252 four-patches.

Did your eyes glaze over a little at all of those numbers? Mine did at the thought of all the cutting and piecing left to do. I might go back to piecing here and there again, and wrap this up in another 5 years or so. Eventually, all these pieces will become a twin-size quilt, finishing at 72” x 90”. In all, there are 3060 pieces, which includes a border using the triangle blocks.

The math is a little bit boring, and sometimes mind boggling, but I kind of like knowing what sort of dragon I've got to slay. It is highly satisfying to come out on the other side of a project this big and not just see, but know exactly how much work went into it.

I just wish there were some way to measure how many yards of thread I'm using.

Tuesday, April 30, 2013

I Demand A Re-Count

If passion drives you, let reason hold the reins.
–Benjamin Franklin

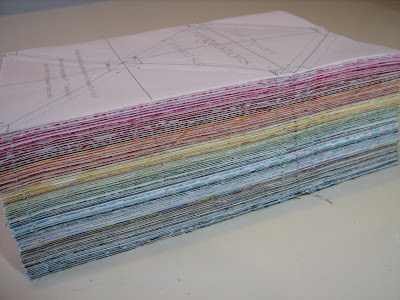
Grace, my ever faithful sewing sidekick, is away on holiday. It will be three weeks tomorrow since I dropped her off for a nice spa retreat. I'm hoping she'll be ready for pick-up tomorrow. In her absence, I've been doing a lot of prep work on quilts I hope to someday finish. One of those prep projects is the result of a half-square triangle swap I did almost a year ago. I got my triangles-in-the-rough back about 5 months ago, and I've been pressing. A lot. Approximately 600 freshly pressed HSTs showing here:

When I put together my triangles for the swap, I formed a plan for what to do with them based on the instructions of putting together a light and a dark fabric for each set of HSTs. I actually heard “neutral and print” and was pretty meticulous with how I put them together. I did roughly the same number of HSTs of every color and split my white and off-white neutrals evenly between the two. As is always the case with swaps, there is room for interpretation and some of what I got back didn't fit in my plans. No matter. The fabrics were still really great, so I unpicked about 300 HSTs {yes, I know :crazy:}, which left me with 600 orphan triangles who needed neutral buddies to become HSTs again. Enter the Go! Fabric cutter, and in a few hours, I was all set to go {yeah, I know. Bad pun, but I couldn't resist. I puns}.

I also put together a few fabrics to fill in on some of the colors I didn't get much back on and will sew those up using the triangle papers we used originally to put our HSTs together. But I'm not showing those because that passes up “particular,” “picky” and “persnickety” and crosses over into “obsessive,” “complusive” and “just plain nutty.”

As I've pressed and cut and sorted, I've been turning over ideas for how to use up 1400± 2½” HSTs. While I was getting my swap triangles done last year I saw a quilt called Triangle Confusion and decided that I wanted to do that. Now that I have the raw materials to work with I've tried a couple of Triangle Confusion layouts. I liked the explosion of triangles with all its patterns and sub-patterns. Then, just for fun, I arranged the HSTs into a more obvious pattern and put it up for an unofficial vote.

I was kind of surprised at the results. Everyone who expressed an opinion chose Diamond Illusion. Although I didn't really know which layout I favored until people started offering opinions {which is why I ask for opinions; it helps me to know what I really want}, I realized that I was leaning more towards Triangle Confusion. It was so bright and cheerful, if not somewhat frenetic. Diamond Illusion was very drab to me even though you could see a definite pattern. Perhaps here was too much brown and orange and green and not enough yellow and pink and turquoise. So I laid it out another way. What do you think?

Green was the color I'd gotten the most back from the swap, so in my first layout I used that for all the small diamonds. It just wasn't working for me. In this new version, I used a different color for each diamond and I think I like it a lot better with more color.

Triangle Confusion is still on my mind, though. I mean, there has to be some way to make it work. So I tried organizing the colors a bit more. I am totally in love with those partial diamonds. The shape is incomplete but the eye finishes it. There's still a lot going on there, though, even with an attempt to make it play nicely by using color to force the sub-patterns. Do you see the large pinwheel in the center?

Still, there is something I really like about Triangle Confusion.

As you can see, I'm still undecided on what to do with all these half-square triangles. Unless I make a king size quilt {which would require another 1700 HSTs and I've almost entirely ruled that out}, I have enough HSTs to make two nice lap-sized quilts; one Diamond Illusion and one Triangle Confusion. The only problem is that I don't have enough of some of the colors to use an even amount in both quilts. Only one of the quilts could be rainbow bright. The other one would have to be mostly green and brown and blue. I could break up the left over browns, blues and greens a bit with solid {meaning unpieced} blocks between pinwheel blocks made of the HSTs and come out with two baby quilts to donate, plus one lap-sized rainbow-y HST quilt for me {design yet to be determined}.

Or, if I decide that I absolutely have to make both a Diamond Illusion and a Triangle Confusion quilt and they both have to have a balanced amount of color, I could make more HSTs, in which case, Jeanette, a swap would definitely be in order :wink:.

And there would probably be enough left-over HSTs for a donation quilt.

Thursday, April 18, 2013

Diamond Illusion or Triangle Confusion?

He puzzled and puzzed till his puzzler was sore. Then the Grinch thought of something he hadn't before. -Dr. Seuss, How the Grinch Stole Christmas

Once upon a time, I made 936 - 2½” half-square triangles for a swap. Our group used a semi-paper pieceing speed method to put together groups of twelve HSTs at a time. For each set of twelve, I used a different main print fabric and I only repeated my neutral white or off-white fabrics in two sets of twelve at most. In the end, I had 78 different sets of 12 HSTs. I kept four HSTs from each set and sent the rest off to the swap hostess. Six months later, I got a box back full of half-square triangle treasure. They sat in that same box for about 3 months, and then in a drawer in my little sewing area, just waiting to be discovered. Last Wednesday, I dropped Grace off for a three-week spa vacation, and when I got home I started pulling the papers off and pressing them open on my spiffy new ironing board cover.


As I've worked, I've been puzzling about exactly what to do with these 936 HSTs when they're all pressed. Actually, I'll have more like 1250 HST's when I'm done. I think there was some room for interpretation in the instructions, which were to pair a light and a dark for each set of HSTs. I heard “print and neutral,” and kind of formed a plan around that. Some of the HSTs I got back don't work for what I had in mind as they are, so I'm unpicking a few more than 300 of them {yes, I know :crazy:} and am going cut a bunch of neutral {white or off-white} HSTs with my Go! fabric cutter {the die that came with it has the perfect triangles} and put them with the prints that I've unpicked from each other. I only have about a hundred more to unpick.

When we were in the planning stages of the swap, Candace at The Double Nickel Quilt Challenge linked a really cool quilt called Triangle Confusion to my monthly finishes linky party, and I decided that's what I wanted to do with my half-square triangles. But as I have been pressing, I've been turning over options for what to really do with these HSTs now that I'm in the process of pressing and sorting. So I laid them out in a diamond pattern to see what it would look like. I really liked it, except it lacks a bit of variety. I chose green for the small diamonds because far and away, green is the color I got back the most of. I'll probably mix it up a little if I go with this layout, but isn't this a cool design?

It is fun to look at each block close up.

As I opened each HST, I tried to guess who made it. Some were easy to guess. Others, not so much.

I love how from far away it gives the illusion that it is a series of interlocking diamonds, but close up you can see each triangle and each print.

I orange. It is a highly underrated color.

I'd really almost made up my mind to go with the Diamond Illusion layout. But just for fun, I laid out a little Triangle Confusion. You can still see the diamond pattern, which I love, but it is an explosion of color.

But you can also see, among other patterns, pinwheels intermingled with the diamonds. Pinwheels are awesome.

Time for some more close-ups. I haven't posted much lately, so it is picture overload today.

It is an interesting block design.

I'm not sure why, but I only took close-ups of three of the four blocks, so this is the last one.

In the first layout, I kept the diamonds each a single color, but I mixed the other colors in everywhere else. I wanted to know how it would effect the overall design if I paired colors in the non-diamond areas {corners} of each individual block.

It is still an interesting pattern, but not quite so much of an explosion, which I think I maybe like. I didn't notice until I was editing photos, that with the colors paired as they are it makes a secondary diamond pattern; or rather, a large pinwheel on point between the diamonds.

That has me wondering what it would look like if I paired it so that the large pinwheels were all one color. I think I might like that best of all {control freak here}, but I'll have to lay it out to see because that might suck all the joy out of Triangle Confusion. I'll probably wait until I get all those other HST's unpicked and the neutral triangles cut, though. I only have about a hundred left.

Even though my puzzler is a little sore, I'm also puzzling over what size to make this quilt. My original plan was a 6 x 8 block layout with a 1" stop border and a sawtooth border beyond that, which finishes at 54” x 70”. That's a really cozy lap-size quilt. But that will leave me with 375± extra HSTs, which I will have to use up in something else. I've pondered other sizes, right on up to a 9 x 11 layout {with no borders} which finishes at a nice 72” x 88” twin size quilt. That will require an additional 300 HSTs beyond what I'm already working with. I kind of like the idea. This quilt is scrappy and patchy and full of calicos, which makes me think of quilting at its roots — quilting out of necessity and using whatever was on hand. Of course, I'm not trying to kid anyone here. I have bins and bins of fabrics and I don't need to quilt, except for the sake of my sanity. I really want this to be a useful quilt, though, because I'm excited about it. A lap size would be used for snuggling under to watch TV or read. I don't know whose twin-size bed this quilt would go on. Maybe I should open an Etsy shop :wink:. Do you think anyone would pay $2300 for a twin-size quilt?

My next thought was to make it square. I really like square quilts. 8 x 8 finishes at 64” square. I even have enough HSTs for a 9 x 9. But then, we're almost back into the bed size quilts, at 72”. So why not go super-size and make it a king? I happen to sleep in a king size bed that needs a pretty quilt on it. But for that, I'd need another 1900 HSTs :faint:.

Anyone want to swap?