Showing posts with label Scrap Quilt. Show all posts

Wednesday, February 18, 2015

Jardim da Amizade: {r}Evolution of A Quilt

The world is but a canvas to the imagination. –Henry David Thoreau

I've been wanting to show you/off this quilt for a long time. Let's pretend it is the beginning of September again. When we left off, I'd just shown the completed signature quilt that was for a wonderful lady who had just turned 100. A dear neighbor, who has a long-arm, offered to do the machine quilting, so we're going to jump back a little further to the last week of August while the signature quilt was out for quilting. I received word in mid-August that some very special friends were coming from Brasil to visit, that they would be here for only a short window of time and that there was going to be a get-together on October 3rd. The gears in my brain began to turn and as soon as I dropped the signature quilt off with the lady who had volunteered to quilt it, I pulled out a bunch of half-square triangles I've had hanging about for a while and got to work.

Fast forward to October 3rd, and voilà. Jardim da Amizade, which translates directly as Garden of Friendship, but it is more comfortable to say Friendship Garden.

I took my inspiration {and this photo} from Wendy Sheppard at Ivory Spring. She is a truly amazing quilter. When I saw her quilt, I knew I wanted to make one of my own. I adapted the design, making my quilt square {I love square quilts}, rather than rectangular and my HSTs are 2" rather than Wendy's 1½" {can you imagine!}. Here's another little tidbit about Wendy's quilt; it took her only 5 days from start to finish.
Color Burst by Wendy Sheppard
Image Source

Wendy was inspired by the quilt below, which is on display at the Daughters of the American Revolution Museum in Washington, DC. I did some quick maths and there are 1,200 small half-square triangles in this quilt, all hand-pieced. Wow!
Old Maid's Ramble on display at the DAR Museum
Image Source

When I got the newsletter from my favorite local quilt shop the other day, I was delighted by another variation of this quilt. Aren't the colors beautiful? It is done in Moda's Lakeside Gatherings fabric line, and I love this take on the design.
Ladies on the Lake by Suzanne
at Corn Wagon Quilt Co.
Image Source

I had the greater part of the half-square triangles I used in my quilt already pieced when I decided to make this quilt. Some of them were even pressed open. The rest were ready and waiting to be pieced. I finished piecing those while the signature quilt was out for quilting, and as soon as that quilt was finished and delivered, I started piecing blocks of half-square triangles. It was a crazy undertaking to try and get this quilt done in such a short amount of time while juggling a full-time job, full-time mom and wife duties and a busy volunteer job at church. More than once I said, I don't know if I"m going to get this done. But I have to try.

I worked color by color and tried not to repeat any one print in each block. I wanted to photograph each block as I went, but it was hard to align my crazy schedule with good lighting as the days grew shorter. And I decided that I'd better spend every spare minute working on the piecing.

I like to do an embroidered label on the back of my quilts, but there just wasn't enough time for this one. Instead I used a permanent, archival quality pen and wrote my label out. I included a quote from Alfred Tennyson, If I had a flower for every time I thought of you, I could walk through my garden forever.

Melissa Kelley at Sew Shabby Quilting saved my bacon again and did yet another rush quilting job for me. After an all-nighter, Mr. Bug dropped the quilt off on a Tuesday morning on his way to work and Melissa had it ready for me on Wednesday evening, just in time for Mr. Bug to pick it up on his way home. She did a beautiful job on an edge-to-edge computerized floral design. I love the way it turned out. I then spent every second I could getting the binding on and hand-stitched to the back.

That week is kind of of a blur, but I'm pretty sure that Mr. Bug and the Not-So-Little Bugs ate a lot of cereal and take-out pizza. I didn't get much sleep and I was pretty useless at work. It was close, but I finished in time to take it to the get-together on Friday night. These are my Brasilian "parents," João Roberto {John Robert} and Maria Lúcia. I respect, admire and love them so much and it was so good to see them again!


This is the first quilt I've done that came completely from my stash. Granted, I did a swap for about half of the little half-square triangles, but all of the fabric I used for the swap came out of my stash and the ones I got back have been sitting in a drawer for so long that they count as stash by default. I did go and buy a piece of Kona in a sort of grayish-blue for the backing, but when I got it home, it wasn't quite right. I had a large quantity of Kona in Coal from a project that will probably never get off the ground, so the blue I bought {I think the color was Rain or Fog or something} went to stash {and is now being used in the next project I'm working on, which is another quilt made entirely from stash and which I hope to show you sooner than four months after it is finished and given away!}.

Other fun facts about this quilt:
• It has 640 small half-square triangles
• The total number of triangles {large and small} is 1,344
• The quilt measures 68" x 68"
• I'm going to make at least one more quilt like this because I'm slightly obsessed with half-square triangles.

Saturday, March 22, 2014

The Signature Block Conundrum

A pretty face will always grow old. A nice body will always change with age. However, a good woman will always be a good woman. –Unknown

The other week, I had the day off of work. It was a Friday and I was happy to start the weekend early. My plan was to meet up with my mom in the big city and enjoy some quality time together while the Not-So-Little Bugs were in school. Unfortunately, LadyBug was sick. So, instead I stayed home with her. I decided that while I had some "extra" time on my hands, I'd do a little on-line shopping for fabric for a semi-special project.

The story goes like this: there is this cutest little old lady in my ward {congregation} who is 99½ years old and still sharp as a tack. Although she can no longer see well enough to drive and she's getting a little frail, she still lives alone in her own home, takes care of herself and spreads happiness wherever she goes. As a matter of fact, last fall she asked if Grasshopper would come over and rake up her leaves. By the time we got to her house the next afternoon, she's already gotten the leaf blower out and blown them into a gigantic pile in the back yard. All we had to do was bag them for her.

I have really enjoyed getting to know her over the last nine or ten years. She is truly an amazing woman. Ever since she turned 99, last September, I've been thinking about making her a signature quilt with, wait for it . . . 100 signature blocks. I'm sure that the people she knows and has influenced could fill about 10 hundred-block quilts, so I'm thinking that all the members of a single family could have one block to sign, and we could keep it to a single quilt at a manageable size.

I've always wanted to do something with 1930's reproduction fabrics, and this seemed like the perfect project. This sweet lady would have been 16 in 1930. I want to do something really scrappy. Keepsake Quilting sells 10" pre-cuts in a variety pack of 1930's prints. Several months ago, thinking of this project, I searched the interwebs for signature block quilts and one particular layout that creates a lattice stuck in my brain, but I wanted to have a plan before I ordered fabric so that I could make sure that I liked the layout and that I ordered enough fabric. I started doodling around with the old {Microsoft} Paint box. {This took me forever. Perhaps EQ should be on my Christmas wish list.}

Lattice Layout

I like the looks of this layout. It is made with the simple block below, which I found on-line. When I went back to my original pencil-and-paper doodle on graph paper from several months ago, which was based on allowing for pre-washing of the pre-cuts and then using the maximum amount of fabric with the least amount of waste to get the biggest block possible, I discovered that the white signature area of the block I drew up was bigger than the one below by about ⅞", which would make the white lattice bigger and the scrappy 1930's reproduction fabrics smaller than in the layout above. I'm not sure if that would be too much white lattice and not enough 1930's reproduction fabrics.


While I was doodling, I decided to try out another layout I'd seen in my previous search. I don't like it as much as the first layout, but maybe with larger white signature areas, I'd like it better.

Diamond Layout

While I was thinking and doodling and searching the interwebs for a refresher on the two layouts above, I found this block.


If the block is turned the right way, it makes pretty flowers. I really like the way this looks, but it leaves the least amount of room for a signature. And a pre-washed {a.k.a. pre-shrunk} 10" square could not comfortably make four 5" blocks. I don't think a 10" block that hasn't been pre-washed could do it. I'd need to take a different approach to getting a variety of fabrics with enough of each fabric to make all four blocks for each flower. On the plus side, the signature area is completely finished and there won't be a problem with people signing into the seam allowances.

Flower Layout

My original plan was to do 5" blocks. That makes a 50" square quilt with either the lattice or the diamond layouts, before borders. The flower quilt has 2" sashings, which makes it 62" square before borders. If I bump it to 6" blocks, that pretty much takes using 10" pre-cuts off the table for all of the layouts. The top two layouts would be 60" before borders and the flower layout would be 75" square {I think I'd increase the sashings to 2½" to maintain the same ratio} before borders, which is pretty huge for a lap quilt. If I was going to go big, then I'd do 7" blocks, and with 2¾" sashings, it would be 86½". Slap on some borders and you've got yourself a queen-size quilt. Which really wasn't my plan.

If I'm going to do this, I'd better get a move on. I've only got six months. In the weeks since I doodled these out, I'd almost decided to go with the flower layout. Looking at them again now, I'm kind of back to liking the lattice layout. I've always like the diamond layout least of all, so at least there's one thing I can rule out.

There are pros and cons to every layout and every block size. Ruling things out further, I think that I will stick with 5" blocks to keep the quilt size in check. I'll probably have to find a nice magnifying glass to give with the quilt so this little old lady, whose eyesight is very poor, can read her own signature quilt. In the cons column for the lattice layout, as previously mentioned, the strip of white fabric will be bigger than pictured so I'm worried that will overpower the quilt. Not previously mentioned, I'm also worried about people signing into the seam allowances, even if I provide clear instructions. I've considered using a Frixion pen to mark the boundaries, but you never know. In the cons column for the flower layout, the signature area is tiny in a 5" block. And it will have to be paper pieced in order to come out right at 5".

If you've got an opinion, please share! It always helps me to decide what I want when I hear from other people. Right now, I'm on the fence between the lattice layout and the flower layout. Vote for your favorite in the comments.

Friday, January 3, 2014

Brag Sheet: 2013

I tried carrying the weight of the world
But I only have two hands.
Hope I get the chance to travel the world,-
But I don't have any plans.

Wake Me Up, written by Tim Bergling, Aloe Blacc and Mike Einziger, performed by Avicci


I wasn't going to do a post about all of my 2013 projects because it didn't really seem like there were many. But I've enjoyed the other 2013 posts, so I looked over my index page and was surprised that even though it seemed like slow going, I got a nice bit of sewing done this year.

First are the projects I put together using Pat Bravo's Indie fabric line. I made two Stitchy Kits, designed by Lori Holt {pattern here}. I gave one away and kept one for myself. And I made a folded fabric star and put it on a tote bag. Somehow, Pat sussed me out and invited me to enter her Instagram contest, which I won. I received a half-yard bundle of Carnaby Street as my prize {by the way, I still need a sewcation} and Pat used the photo of my folded fabric star as the header on her Flickr page. The post of the finished fold star tote bag is my most popular post of all time, with 9,822 9,823 9,826 visits to date.

I put together a few other non-quilty things this year: two Christmas ornaments in January, stragglers from Christmas 2012; a Christmas table runner for a lady I know whose birthday is on December 24th; a new reversible ironing board cover; a Magicka Wizard's robe for Grasshopper's Halloween costume; and two little booklet holders.

Although this has nothing to do with sewing, I was inspired by Shay, who included her travels in her 2013 wrap-up post, and thought I'd throw in our family vacation with a few days at Lava Hot Springs, Idaho, a few days at Yellowstone National Park, Wyoming and a quick drive-by of Grand Tetons, Wyoming. Fun stuff! More family travel is definitely in our future.


And finally, even though it didn't feel like it, I got a few quilts done; a Drunkard's Path, Ripples, for a friend for her birthday; a 4" square mini for LadyBug's report on Pennsylvania {which is where the Amish live and the Amish are famous for quilting} and which ended up as a quilt for her Guard Lizard, Gilbert; a scrappy baby quilt, Little Boy Blue, for a friend's new baby; a framed Double Wedding Ring, Echoes of Eternity, for a wedding gift in the bride's colors; a zig-zag quilt, Miss Butterfly's Flower Garden, for my niece, Miss Butterfly, to use on her bed; a batik quilt, Sea Glass, for a friend for her birthday; and even though I didn't make the quilt top, I'm counting the quilting I did for P. on her String Ring Dresden as a finish for me as well. At 75" x 95", it is the biggest quilt I've done.

I'm excited for 2014. My goal for this year is not to over commit. I have loads of Ph.D quilts that I want to work on and I've made out a mental list of things I want to work on, but I'm leaving it open to see what inspires me.


Today's post brought to you by:
My 2013 Finishes

Saturday, December 21, 2013

P.'s String Ring Dresden: Finished at Last

Nobody trips over mountains. It is the small pebble that causes you to stumble. Pass all the pebbles in your path and you will find that you have crossed the mountain. –Unknown

First, welcome to all my new followers! I've had about 25 new people jump aboard my crazy train in the last 24 hours. I'm glad you're all here! If you don't mind me asking, what or who sent you my way? I can tell something is going on over at The Facebook and that it has something to do with my Folded Fabric Star, but I haven't been able to trace the source. I'd love to be let in on the secret. I hope no one is promising you big things, because it is slow going over here right now. Case in point, the quilt I'm about to show.

P. mailed this quilt to me on December 12th. I mailed it back to her all quilted on December 20th. Now, that sounds pretty awesome, doesn't it? Fastest quilting job ever, right? Not so much. She mailed it on December 12, 2012 and I mailed it back on December 20, 2013. And I actually could have mailed it earlier this week. Procrastination at its finest. {Hangs head in shame.} P. has been more than patient with me, which I truly appreciate. I hope her patience is rewarded.

I put the quilt on LadyBug's bed for a little photo shoot. My camera didn't like the light quality, so it is a little blurry. But here it is. Finished! Aside from the unbound edges, it kind of looks like it belongs there. {Sidebar: Isn't LadyBug's bed pretty? I bought assemble-it-yourself bedroom sets for Grasshopper and LadyBug seven or eight years ago. Grasshopper's had blue labels on the boxes and the set is a pretty [TARDIS] blue. I put his together first. LadyBug's set had pink labels on it and when I pulled out her white furniture pieces, she asked why hers wasn't pink. It's funny now because I'm pretty sure she'd refuse to sleep in a pink bed.}

Here is a close up of the quilting in the String Ring Dresdens {from which the quilt gets its name}. I'm really happy with how they turned out. I was so worried about getting the quilting right in the Dresdens because they are the focus of the quilt.

And here's a gratuitous PictTapGo_App and Instagrammed shot. They totally need to make PC versions of these apps :wink:. It is fun to play around with the filters.

Here's a close-up of the scrappy border and one of the diamonds. I'm all about coloring inside the lines. I like to quilt to enhance the piecing. I tried to keep it fairly simple — mostly straight lines, with bit of free-motion to accent — as P.'s directive was {paraphrasing} “less is more.”

And I made an embroidered quilt label to go on the back as a thank you to P. for trusting me with her quilt. When she started this quilt, she put out a call for strings. I sent her a few fabrics {as I quilted I noticed that fabrics I sent her were in 11 of the 12 Dresdens}, so I pulled a few favorites from those to use in the label {which is now outdated. I had a serious case of project procrastination on this quilt. Sheesh.}. It is meant to sit in a corner of the quilt, so I hope P. will show us how it looks when she's trimmed and bound the quilt.

I'd like to send a huge thank you to Paulette for her trust, patience and friendship. I really hope you like the quilting!

More about this quilt:
P.'s Post on How the Idea Came About
P.'s Post on the Significance of the Color Scheme
P.'s Post on Design Decisions
P.'s Post on the Finished Flimsy
P.'s String Ring Dresden Tutorial
A Start on the Quilting
A Little Bit of Quilting Progress
Getting Closer
P's Post on the Bound and Finished Quilt

Today's post brought to you by:
My 2013 Finishes

Wednesday, December 11, 2013

A String Ring Dresden Quilt Progress Report

Paralyze resistance with persistence. –Woody Hayes

The ditch quilting is done. The embellishments in the pieced border and black diamonds are finished. I crissed and I crissed and I crissed. Then I procrastinated. Eventually I got around to some crossing. After a little more procrastination I crossed and then crossed some more. And I finally got the straight line quilting finished in P.'s String Ring Dresden. {I PicTapGo_Apped and Instagramed [find me @suchasewandsew] the photo and it's supposed to be all artsy smarsty, but it just looks over-exposed. The original is not much better. It's kind of hard to tell when you've got less than 3" square of photo to go on.}

The red centers in the Dresdens are all crissed and crossed too. All I have left to quilt is something fancy in the Dresden rings. {See, it's a crap shoot with full-size photos that have been PicTapGo_Apped and Instagramed. This one is kind of awesome.}

That fancy pants quilting that remains to be done is at the root of all of the procrastination. It is very intimidating to quilt for another quilter. But as soon as I finish those Dresdens, then I can work on anything I want {read: I have forbidden myself to even think of another project until this one is done}. I have a good idea. Now I just need to put needle to quilt and make it work. And so off I go to my Jolly Holiday Workshop. A little music to quilt by, if you please.


Available for purchase from The Piano Guys or on iTunes.

Monday, September 30, 2013

We Now Return You To the Regularly Scheduled Program

The property of rain is to wet, and fire to burn; that good pasture makes fat sheep; and that a great cause of the night is lack of the sun. –William Shakespeare, As You Like It, Act 3, Scene 2

I've been working on and off for about 4 months on the quilting for a flimsy that P. made. When it's "on" I make a lot of progress. But it's mostly been "off." When last I left off, I had the ditch work and border finished and almost half of the background quilting {diagonal lines through most of the quilt} finished.

I've been working on it again the last couple of weeks and had really hoped to have it finished by now. But I seem to overestimate my abilities to bend time to my will and underestimate the number of distractions in the way of Parent Teacher Conferences with really long lines, play dates, loads of laundry, meals to prepare, sick days {I had my first cold in more than two years}, the need to sleep for ⅓ of the day and just plain life. And I have about a zillion other projects in progress that sometimes just call to me and I have to stop and work on those. Nevertheless, I am roughly ⅞ of the way finished with the diagonal quilting.

I like being on the far side of the half-way point. It means I have less left to do than I have already done. And it's when things all start to take shape and that pesky voice of self-doubt is quieted, either because it was a good plan and it's coming together or because it is too late to do anything about it anyway.

I've been using blue painter's tape to mark the lines for quilting. The tape is really only good for one use; it picks up too much lint on its special clean-release adhesive and so I started a tape ball. I didn't think about it until I was about ⅔ of the way through and had already used a full roll of tape and was a good way into my second roll, but it's still a good size — bigger than a golf ball, but smaller than a baseball. I ran out of daylight today, what with all those things that keep cropping up, like people needing clean underwear and homework checked, so I'll show you a photo another day. In the meantime, you can see my marking system and if you look closely, you can see the pattern starting to fill in in the bottom right corner of the photo.

If I hurry, I can make the tape ball a little bigger before the requisite hour begins to get my full 8 hours of sleep.

Tuesday, August 13, 2013

South for the Winter

Give thanks for what you are now, and keep fighting for what you want to be tomorrow. –Fernanda Miramontes-Landeros

Since July 4th I've been puttering around with my Patriotic Sampler. This is a project I started before LadyBug was born {which was 11½ years ago. Can she be that old already?} and is my second oldest Ph.D {Project Half-Done}. I keep thinking I need to put it away and work on something else, but there is always another something fun to tinker with on this quilt. I put together 120 flying geese for the outer border. I geese. And I this no waste method for flying geese.

I also made the transition pieces for the centers of the flying geese border. When I originally planned it, I'm pretty sure I envisioned diamonds {square in a square} at the center of each side between the geese. But because I didn't write my plans down anywhere, I had to come up with it twice. When I finally added the border to my layout graphic, I put in alternating strips of red and blue to bridge the gap between the different colors of geese. But once I had my strip sets sewn, I knew they needed to be diamonds rather than squares/rectangles.

I scanned the blocks and added them in to my layout. I really like how the diamonds look {compare to the previous incarnation}.

I forgot math while I was working on my border centers and accidentally made the ones for the sides too long. It took me for. ev. er. to get the background triangles in the corners right. I only discovered the blocks were too long when I went to square them up. But aren't they pretty?

Anything that I went to that much trouble to make does not end up in the discard bin. I decided to use them as a part of one of the place mats. {Backstory: I have this huge blank wall in my kitchen. I want to make a quilt for every month to display there, and have coordinating place mats on the table, which is next to the wall.} Place mats are fun, but I think for any future quilts, I'll probably do a table runner instead of place mats. Because no one will eat off these place mats. Ever.

A row of geese on each place mat was the original plan. I really like how it looks. There will be a sashing strip between and a border of the same width all the way around.

Since I used those discarded stripey diamonds on that first place mat, I decided to mix it up a little on some of the other place mats as well.

Another one with a row of geese.

Three diamonds made out of the geese units seemed to fit really well with this block.

And another one with just geese. It was purely coincidental that I ended up with three with rows of geese and three with something different. It was also purely coincidental that I posted them in alternating order.

I love the pretty red, white and blue scrappiness of this project. And I love the tan that ties everything together.

I started to put sashings on the quilt blocks for the top. Here it is on my living room floor up on my design wall. I debated about whether to just go ahead and put the top together, but I still need to finish eight of those tiny paper pieced five-point stars {I made three more since my last report} that go at the corner of each block. And didn't want the quilt top to sit folded somewhere for the next nine months until I can get to quilting it, so I only put things together insofar as they won't have to be folded when I put them away.

My last bit of puttering was to figure out how to label this puppy. Two of the blocks {The Old Red & Blue and Land of Liberty} are original designs by Marcia Hohn at The Quilter's Cache and her terms and conditions of use stipulate that any original block be credited to her and her site referenced in a permanent manner on the back of the quilt. I picked up ideas and/or patterns for a number of the other blocks from other folks around the internet {credits here}, so in fairness to everyone who creatively contributed, I decided to make a little embroidered label for each block. They are between 1½" and 2" tall and 4" wide. There's also a label with the name of the quilt {This Land Is My Land} and credits to me for piecing, layout and quilting. I'm going to put them together in a strip that will go up the back of the quilt along length of the seam where I join the two pieces of fabric to make it wide enough. I'll add varying lengths of strips of red and blue fabric or left over geese between each embroidered piece. I'll keep the labels in my go bag for hand projects for when I know I'll be sitting and waiting. Hopefully, I'll have them all finished when I'm ready to get this quilt out again and finish it. {Sidebar: LadyBug had her pre-6th grade well-child check the other day. I didn't bring anything to work on because I thought we'd be in and out in a jiffy. The last few times we've been in for other things, I've barely got my project out when they're ushering us out the door. But after 10 minutes in the waiting room, we sat for a full 30 minutes in the exam room before the doctor came in. I think they forgot we were in there because they weren't busy. We entertained ourselves with a rousing game of "I Spy." Lesson learned. Always bring a project. Always.}

I put everything back in the storage tote today. I made myself little notes and put things in separate baggies so that when I get this back out again, I won't have to reinvent. There's not much left to do before I have a flimsy. Eight 5-point paper pieced stars; adding the sashings and corner stones to the blocks, sewing the blocks together, sewing the flying geese border together and adding it to the quilt.

Yes. Next year is definitely the year to get this quilt finished. But for now, the 120 geese {and company} are flying south for the winter.

Saturday, August 3, 2013

Tiny Stars All In A Row

[Miss Tick] said, “Are you listening?”
“Yes,” said Tiffany.
“Good. Now . . . if you trust in yourself . . .”
“Yes?”
“. . . and believe in your dreams . . .”
“Yes?”
“. . . and follow your star . . .” Miss Tick went on.
“Yes?”
“. . . you’ll still be beaten by people who spent their time working hard and learning things and weren't so lazy. Goodbye.”

–Terry Pratchett, The Wee Free Men

Since July 4th, I've been puttering around with my patriotic themed quilt. I finished the last two blocks for the top and then started putting together some tiny 1" paper pieced stars. My little pile has grown from seven to 20 of 31 {27 for the front and four to go on the label on the back of the quilt}.

I also decided to measure my blocks for accuracy. This is one of the first quilts I ever started {it's my second oldest Ph.D} and I knew that some of the blocks were a little off. The blocks I did last year and this were OK, but most of the older blocks needed fixing. Some of them just needed to be taken apart, the pieces squared up and put back together with an accurate ¼" seam allowance. Others, I unpicked, changed out a few fabrics and put back together, and I even completely remade a couple.

I'll probably be moving on to another project soon, but my goal is to have the pieces close to being ready to put together into a quilt top when I get it back out again next year. I'm think I'm done with the stars for now. But I put together the blocks that go in the corners. I love how they came together!

I think I'm going to work on the flying geese a little bit, and then it will be time to put this quilt away for a while. Next year, I will remember to get this out in time to have it finished and displayed for the holiday!

Tuesday, July 9, 2013

Seven Days Without Sewing Makes One Weak

Doldrums: \ˈdōl-drəmz\
Noun
1. a spell of listlessness or despondency
2. a part of the ocean near the equator abounding in calms, squalls, and light shifting winds
3. a state or period of inactivity, stagnation, or slump


Once upon a time, about 2½ weeks ago, I kind of fell into a funk. About six weeks ago, I made a major adjustment to my schedule so that I could be around more for the Not-So-Little Bugs during summer. Overall, it has been a really positive change. I like being the first one in at work. I get a lot more done while it's quiet. And I also get to go home before everybody else; before lunch even. I think, too, that going to bed earlier {it's usually still a little bit light out} and getting more sleep has had a positive effect on how many migraines I get and how long they last {i.e., I'm having fewer and they don't hang on for days}.

I'm trying to keep this as non-whiney as possible, but what this little back-story is leading up to is that somewhere in there, I kind of lost my "me" time. And maybe a little bit of me, too. I know that making sacrifices for your kids is part of being a parent. But I kind of felt like there was a whole lot of resistance in the ranks to where I wanted to go {which, in the literal sense, was anywhere but sitting around at home staring at the screens all day}, getting up early to go to work, going to bed early so I could get up early to go to work, and trying to out-stubborn {in a happy, positive, encouraging kind of way} the reticent {or alternately defiant} Not-So-Little Bugs all combined to make me feel like I was kind of failing a little bit at life. Subsequently, not even sewing sounded fun. So for a few days, I didn't.

Going without sewing for a few days is no big deal. Sometimes you just need a little break. Going a whole week without sewing was kind of a red flag for me. I decided that I'd better get back to the machine and I started to write this post. Well, sort of. I had a clever post title {I puns}. A few more days went by and still no sewing. At around the 11th no-sew day, it became a bit of a game and I decided to see if I could go a full two weeks without sewing. I think that was the turning point and by day 13, I was itching to do something creative. It was the 4th of July and it is kind of my tradition to work on my Patriotic Sampler for a few days every year around this time. {I know. It would make more sense to start working on it in April so it would be finished and ready to display on the 4th.}

I've been working on this sampler for about twelve years now. I started it when I was pregnant with LadyBug. She's eleven. It is my second oldest Ph.D, and I don't know why I don't just finish it already :lol:
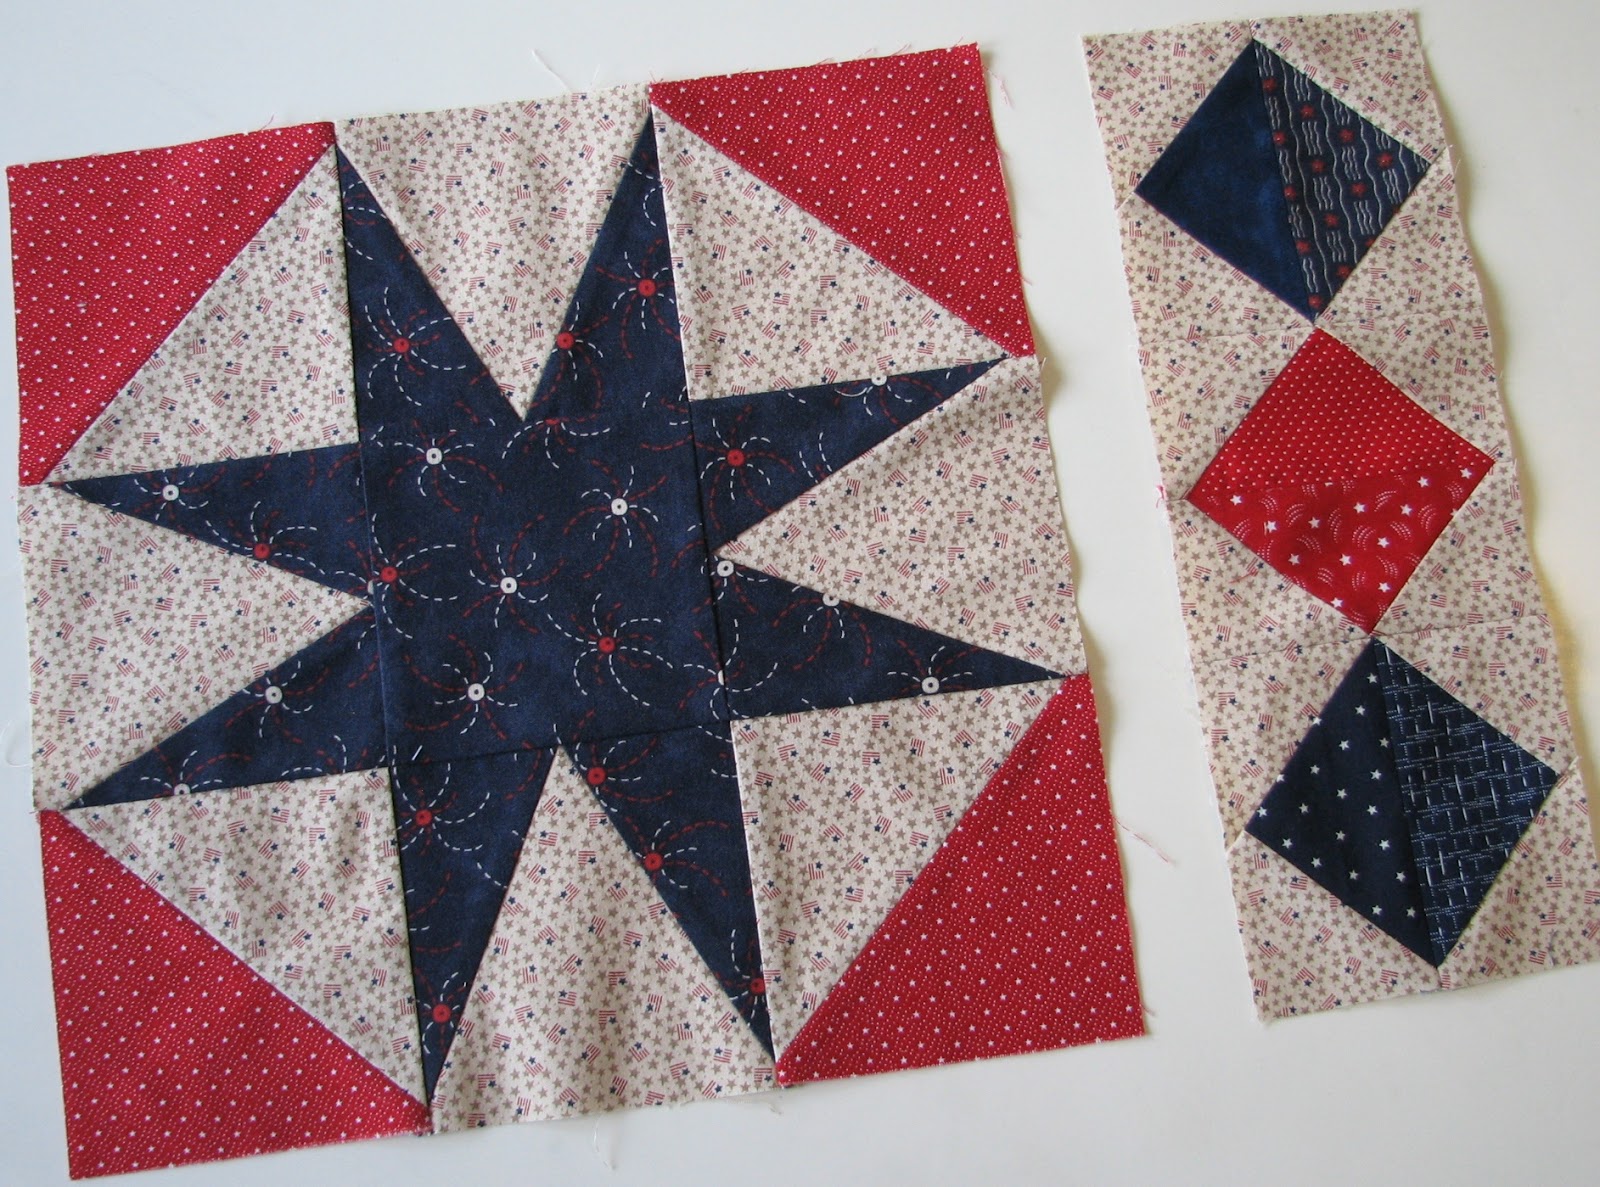
. I'm so close. Anyway, I decided I'd work on some of the itty, bitty paper pieced stars that go at the corners of the blocks in the sashing. It was then that I found out that my post title was more true than I knew. After the first star {which took an hour because I fussed and fiddled and unpicked a lot to try and get the stripes to line up} I was ready to quit. My sewing muscles {the mental ones that help you push through a boring/difficult/unpleasant part of a project} were seriously out of shape. I persisted, even though I didn't really want to. The non-stripey ones only took thirty minutes each. Seven down. Only twenty more to go.

Cute, no? They finish at 1". Who designed this quilt anyway?
Oh. Right. It was me.

After I'd had my fill of that, I put together one of two remaining blocks for the quilt top. It has been cut out and ready to go for, oh, I don't know. Four years now? This one is called Land of Liberty as was designed by Marcia Hohn at The Quilter's Cache. I kind of love it. Pinwheels and flying geese in the same block? It doesn't get better than that.

For the final block, I had three contenders, only two of which I can remember at the moment, so I won't even bother to tell you about the losers. I showed them to Mr. Bug and he said, hands down, this should be the final block. It is called Spiderweb Star, and it is pretty awesome. {Note: if you make this block, reverse the cutting directions for template piece C/CR.}

I also fiddled around at the old doodle pad {Microsoft Picture Manager & Microsoft Paint} and changed my sashing from tan {the same tan used for most of the block backgrounds. Yeah, not sure what I was thinking there.} to white, moved the blocks around a bit and added the flying geese border. It's kinda wild and crazy. I think it will be a little more mellow with a scrappy collection of reds and blues in the flying geese section. I'm debating about whether or not to add a border between the sashing and the geese and another on the outside of the geese. What do you think?

Block Credits:
Row 1 - left to right
The Old Red and Blue by Marcia Hohn at The Quilter's Cache
Zig-Zag Flag inspired by Karen at The Recipe Bunny
Our Eagle pattern from a BOM my mom did at her LQS

Row 2 - left & right
Glory Flag pattern from a BOM my mom did at her LQS
Crossroads traditional block

Center Section - left to right, top to bottom
Uncle Sam pattern from a BOM my mom did at her LQS
Patriot's Star {modified} at eQuiltPatterns.com
Banner Flag by Elizabeth
US Ribbon at Compuquilt
Pledge of Allegiance Embroidery by Elizabeth

Row 3 - left & right
July Fourth traditional block
54-40 or Fight {modified} or Star Shield traditional block

Row 4 - left to right
Land of Liberty by Marcia Hohn at The Quilter's Cache
Courthouse Steps traditional block
Spiderweb Star at McCall's Quilting