Showing posts with label 2013 Finishes. Show all posts

Friday, January 17, 2014

Christmas Memories Part V: A Very Important Date

♫♪ EM EYE SEE ♪♫
See ya later.
♫♪ KAY EE WHY ♪♫
Why? Because we're going to Walt Disney World!


♫♪ EM OH YOU ESS EE ♪♫

Our goal this Christmas was to make memories instead of collecting more stuff. We did a few fun things before Christmas and one of the gifts that was under the tree for LadyBug and Grasshopper was a monogrammed Mickey Mouse silhouette luggage tag for each of them with a note saying that we are going to Walt Disney World. I only finished the tags for the Not-So-Little Bugs in time for Christmas. I finished the four others this week. I used clear tablecloth plastic to make windows on the back to put our information on and we are set to go.

The time has finally come. Reservations have been confirmed. A superfluous supply of Dramamine has been acquired. The bags are almost packed. And we are all beyond excited.

See ya real soon . . .


Today's post brought to you by:
My 2013 Finishes My 2014 Finishes

Friday, January 3, 2014

Brag Sheet: 2013

I tried carrying the weight of the world
But I only have two hands.
Hope I get the chance to travel the world,-
But I don't have any plans.

Wake Me Up, written by Tim Bergling, Aloe Blacc and Mike Einziger, performed by Avicci


I wasn't going to do a post about all of my 2013 projects because it didn't really seem like there were many. But I've enjoyed the other 2013 posts, so I looked over my index page and was surprised that even though it seemed like slow going, I got a nice bit of sewing done this year.

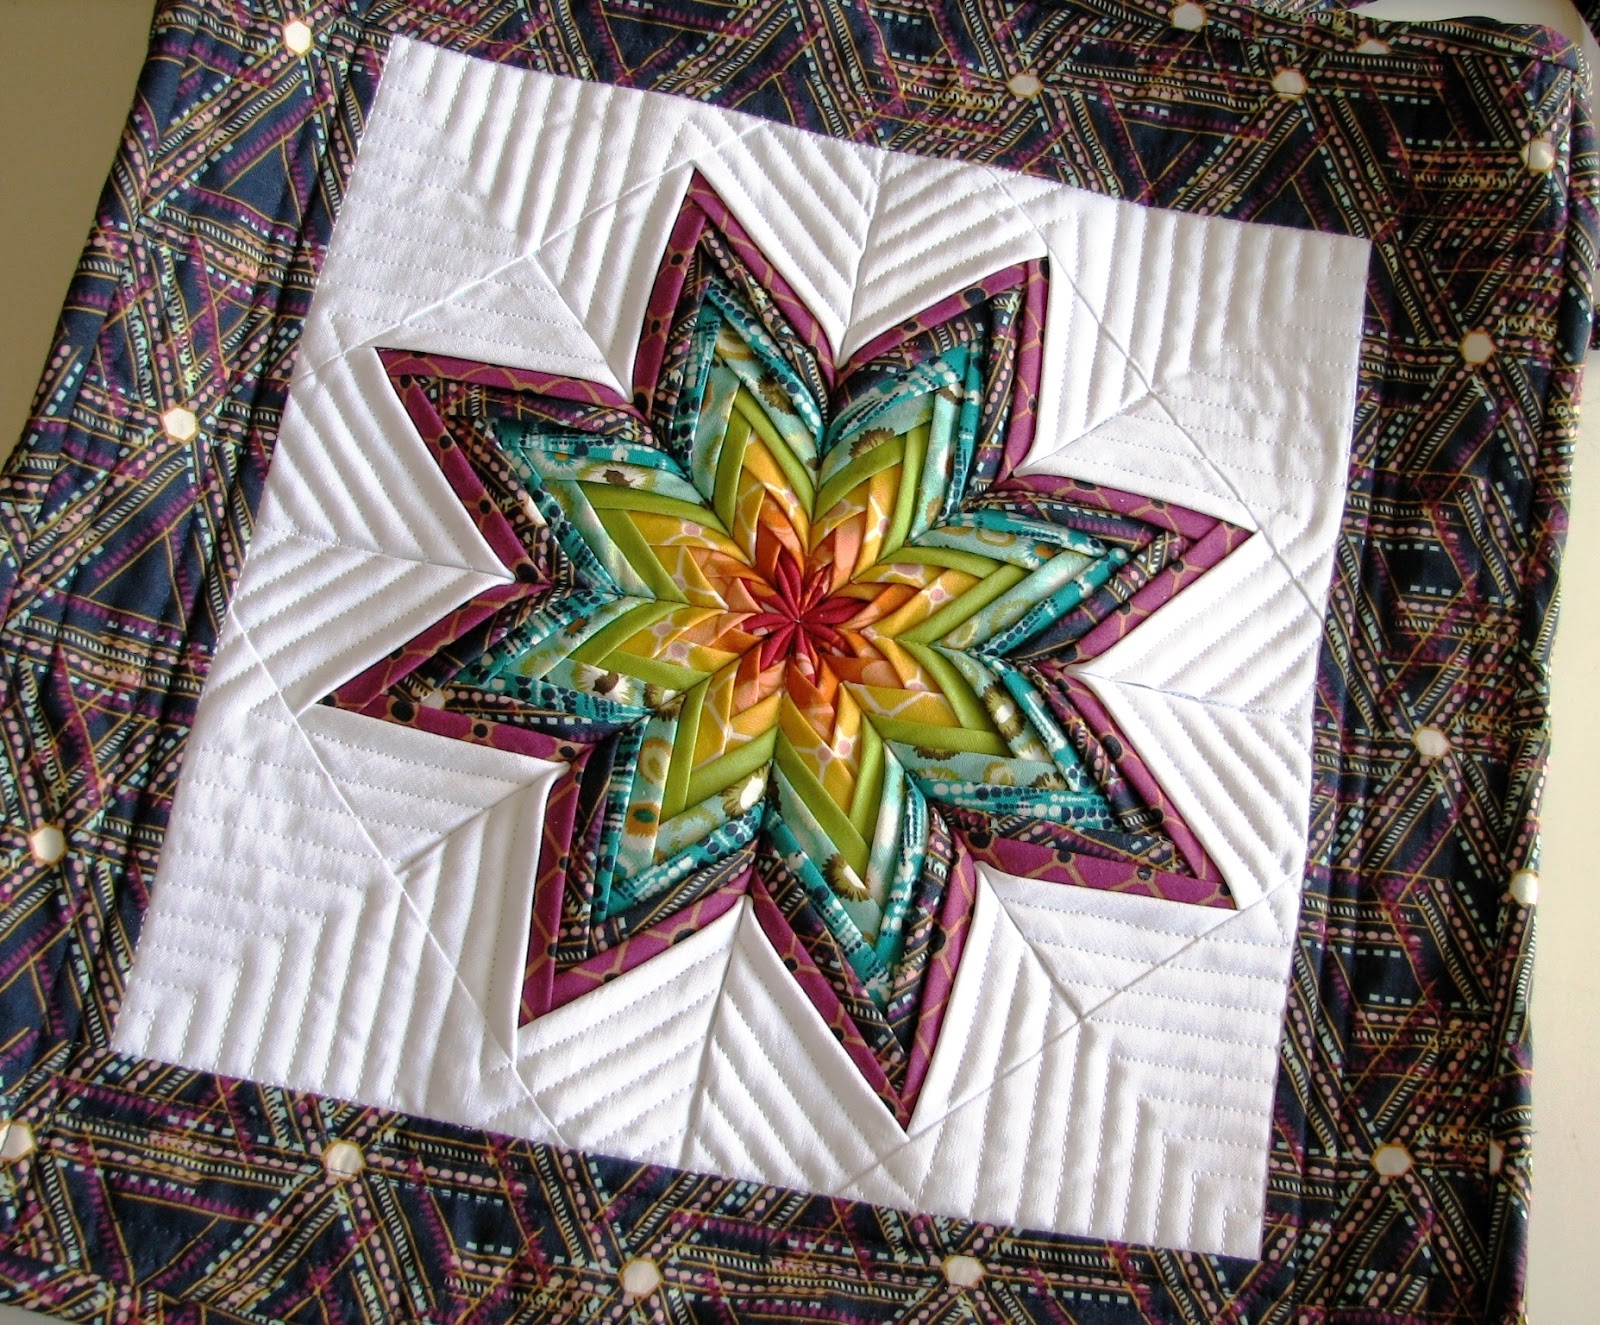
First are the projects I put together using Pat Bravo's Indie fabric line. I made two Stitchy Kits, designed by Lori Holt {pattern here}. I gave one away and kept one for myself. And I made a folded fabric star and put it on a tote bag. Somehow, Pat sussed me out and invited me to enter her Instagram contest, which I won. I received a half-yard bundle of Carnaby Street as my prize {by the way, I still need a sewcation} and Pat used the photo of my folded fabric star as the header on her Flickr page. The post of the finished fold star tote bag is my most popular post of all time, with 9,822 9,823 9,826 visits to date.

I put together a few other non-quilty things this year: two Christmas ornaments in January, stragglers from Christmas 2012; a Christmas table runner for a lady I know whose birthday is on December 24th; a new reversible ironing board cover; a Magicka Wizard's robe for Grasshopper's Halloween costume; and two little booklet holders.

Although this has nothing to do with sewing, I was inspired by Shay, who included her travels in her 2013 wrap-up post, and thought I'd throw in our family vacation with a few days at Lava Hot Springs, Idaho, a few days at Yellowstone National Park, Wyoming and a quick drive-by of Grand Tetons, Wyoming. Fun stuff! More family travel is definitely in our future.


And finally, even though it didn't feel like it, I got a few quilts done; a Drunkard's Path, Ripples, for a friend for her birthday; a 4" square mini for LadyBug's report on Pennsylvania {which is where the Amish live and the Amish are famous for quilting} and which ended up as a quilt for her Guard Lizard, Gilbert; a scrappy baby quilt, Little Boy Blue, for a friend's new baby; a framed Double Wedding Ring, Echoes of Eternity, for a wedding gift in the bride's colors; a zig-zag quilt, Miss Butterfly's Flower Garden, for my niece, Miss Butterfly, to use on her bed; a batik quilt, Sea Glass, for a friend for her birthday; and even though I didn't make the quilt top, I'm counting the quilting I did for P. on her String Ring Dresden as a finish for me as well. At 75" x 95", it is the biggest quilt I've done.

I'm excited for 2014. My goal for this year is not to over commit. I have loads of Ph.D quilts that I want to work on and I've made out a mental list of things I want to work on, but I'm leaving it open to see what inspires me.


Today's post brought to you by:
My 2013 Finishes

Monday, December 30, 2013

A Few Christmas Finishes

You can chase a butterfly all over the field and never catch it. But if you sit quietly in the grass it will come and sit on your shoulder. –Unknown

I've heard it said that the things you regret most in life are the ones you didn't try. I can't say no to anything because I want to do everything. I have overcommitment issues. And so I start a project a find out it is taking longer than I planned, so I put it on hold so I can do something else that isn't going to take very long, but then it takes longer than I expect and so I move on to something else, hoping to get it done and then go back and finish up the other things I started but never finished. Kind of like chasing a butterfly. And then another one.

As Christmas, and consequently, the end of the year approached, I had to make some hard and fast decisions about what was important to finish and what was important to let go for the sake of my sanity. I decided to let my neighbor gifts go this year. I like to make an ornament for about 50 of my closest family, friends and neighbors, and it was really hard to decide not to chase that particular butterfly. In hindsight, it was a good choice to make. I only got a handful of neighbor gifts—less than 10, in fact. Giving up that one tiny {gigantically huge, completely insane} project freed up some time for me to enjoy with my family.

Finishing the quilting on P's. String Ring Dresden {see it bound here} and another project that is under wraps for a couple more weeks has occupied a lot of my time lately, so I only made a few small things this year for Christmas gifts, but they were so much fun!

For cousin gifts, I made these cute holders {tutorial here} for the Young Women Personal Progress booklet and journal and For the Strength of Youth pamphlets. The Young Women of our Church, girls ages 12 to 18, are encouraged to live a standard of personal worthiness and to set goals for themselves in many different areas of their development {the Young Men have a similar program, and really all members are encouraged to live up to the same standard}. A couple of years ago now, I think, Deena Rutter designed a line of fabric for Riley Blake called Good Life, which is themed around the Personal Progress program. When I came across the tutorial for the booklet holders, I knew this fabric would be perfect for them and that they'd make cute Christmas gifts for a couple of the cousins. Even though the fabric line has been out for a while, I was able to find a shop here in town and a couple of on-line shops, including Deena Rutter's Etsy shop, that had enough of what I was looking for. And since these could be for any one of the Not-So-Little Bugs' forty cousins and I'm not giving you any clues as to who the girls belong to, I'm not blanking out the names so you can see my cute embroidery. Well, actually, they could be for only about half that many, but you still get my point. The under-eighteens remain anonymous. This first one is in the white colorway. Love it!

This one is in the blue colorway. I love the pretty colors. LadyBug turns 12 in February and I have fabric to make one of these for her in the green colorway. OK. Confession time. I actually have fabric to make about 45 more of these. I kid you not. I got carried away. I'm not sure what I'll do. Maybe I'll start making them and giving them to the girls in my ward {congregation} for their birthdays. Or all the nieces who are 12 or older. Or maybe I'll make them to sell on Etsy. Or just sell the kits to make them on Etsy. Who knows? But there are a few possibilities there.


This last one is a fun table runner for a lady in my ward whose birthday is December 24th {I wonder if, after 75 years, she's tired of getting Christmas and her birthday all lumped together?}. These are fast and easy to make. It takes ⅓ yard of focus fabric and ½ yard of accent fabric and in a few minutes you have a really cute table runner {tutorial here}.
Hooray for a few finishes in December!

Today's post brought to you by:
My 2013 Finishes

Saturday, December 21, 2013

P.'s String Ring Dresden: Finished at Last

Nobody trips over mountains. It is the small pebble that causes you to stumble. Pass all the pebbles in your path and you will find that you have crossed the mountain. –Unknown

First, welcome to all my new followers! I've had about 25 new people jump aboard my crazy train in the last 24 hours. I'm glad you're all here! If you don't mind me asking, what or who sent you my way? I can tell something is going on over at The Facebook and that it has something to do with my Folded Fabric Star, but I haven't been able to trace the source. I'd love to be let in on the secret. I hope no one is promising you big things, because it is slow going over here right now. Case in point, the quilt I'm about to show.

P. mailed this quilt to me on December 12th. I mailed it back to her all quilted on December 20th. Now, that sounds pretty awesome, doesn't it? Fastest quilting job ever, right? Not so much. She mailed it on December 12, 2012 and I mailed it back on December 20, 2013. And I actually could have mailed it earlier this week. Procrastination at its finest. {Hangs head in shame.} P. has been more than patient with me, which I truly appreciate. I hope her patience is rewarded.

I put the quilt on LadyBug's bed for a little photo shoot. My camera didn't like the light quality, so it is a little blurry. But here it is. Finished! Aside from the unbound edges, it kind of looks like it belongs there. {Sidebar: Isn't LadyBug's bed pretty? I bought assemble-it-yourself bedroom sets for Grasshopper and LadyBug seven or eight years ago. Grasshopper's had blue labels on the boxes and the set is a pretty [TARDIS] blue. I put his together first. LadyBug's set had pink labels on it and when I pulled out her white furniture pieces, she asked why hers wasn't pink. It's funny now because I'm pretty sure she'd refuse to sleep in a pink bed.}

Here is a close up of the quilting in the String Ring Dresdens {from which the quilt gets its name}. I'm really happy with how they turned out. I was so worried about getting the quilting right in the Dresdens because they are the focus of the quilt.

And here's a gratuitous PictTapGo_App and Instagrammed shot. They totally need to make PC versions of these apps :wink:. It is fun to play around with the filters.

Here's a close-up of the scrappy border and one of the diamonds. I'm all about coloring inside the lines. I like to quilt to enhance the piecing. I tried to keep it fairly simple — mostly straight lines, with bit of free-motion to accent — as P.'s directive was {paraphrasing} “less is more.”

And I made an embroidered quilt label to go on the back as a thank you to P. for trusting me with her quilt. When she started this quilt, she put out a call for strings. I sent her a few fabrics {as I quilted I noticed that fabrics I sent her were in 11 of the 12 Dresdens}, so I pulled a few favorites from those to use in the label {which is now outdated. I had a serious case of project procrastination on this quilt. Sheesh.}. It is meant to sit in a corner of the quilt, so I hope P. will show us how it looks when she's trimmed and bound the quilt.

I'd like to send a huge thank you to Paulette for her trust, patience and friendship. I really hope you like the quilting!

More about this quilt:
P.'s Post on How the Idea Came About
P.'s Post on the Significance of the Color Scheme
P.'s Post on Design Decisions
P.'s Post on the Finished Flimsy
P.'s String Ring Dresden Tutorial
A Start on the Quilting
A Little Bit of Quilting Progress
Getting Closer
P's Post on the Bound and Finished Quilt

Today's post brought to you by:
My 2013 Finishes

Saturday, November 23, 2013

Ripples

Thousands of candles can be lighted from a single candle, and the life of the candle will not be shortened. –Buddha

I am excited to share the finished Drunkard's Path quilt, which I finally decided to simply call Ripples. I love how it turned out.

This quilt has always been for my friend, Kim. From the moment I cut it out, I knew it was for her. In it's raw form, I knew it was for her. Sitting in a drawer for three years, it was always for her. When the timing was finally right, and especially in this layout, it is for her. When she opened it out, she said that these were the colors in her bedroom and that it was going on her bed.

But to be honest, if this quilt hadn't had someone else's name stitched into the back, I would have kept it for myself. While we're being honest, I'm still not sold on the name, Ripples. I almost called it Reaping {Galatians 6:7 — for whatsoever a man soweth, that shall he also reap}, but the layout and the colors and the theme all pointed me towards ripples on the water. And because I wasn't sure if the layout and name of the quilt quite conveyed the sentiment behind the quilt {because I know this wonderful woman sacrifices a lot to serve her family and so that her husband can serve others both in his work and his volunteer church assignment and I wanted to show my love and appreciation} I embroidered the Edward Markham poem around the edge of the label.

There is a destiny which makes us brothers;
None goes his way alone.
All that we send into the lives of others
Comes back into our own.

I knew it would be a big job, so I debated about leaving the poem off. I filled in the details first, and then showed Mr. Bug my template, with the poem around the outer edge. He said it looked cool and that I should do it. I used my tiniest embroidery needle, a size 12, and a single strand of floss. When I was finished, Mr. Bug was able to read it {although the lighting here makes it kind of hard; I did tweak the contrast a bit to hopefully make it easier to see} and I'm really glad I put it on.

I hadn't originally planned to put a border on this quilt. It should have finished at 56" x 56", but due to a little bit of shifting when I ran the fabrics through the Go! Cutter, I needed to square up all of my blocks. I only lost 2" total, but the quilt seemed a bit small so I improvised {not really my strong suit}. I didn't have enough left of either the tan or the off-white to make a complete stop border {and didn't really have the time to make a fabric store run}, so I used them both and threw in some of the chocolate brown at the corners for good measure. Mr. Bug, who I often use as a sounding board, wasn't sure about them. He said I should just do the dark brown border. I was almost convinced, but decided to leave the stop border in and am glad I did. I love to get Mr. Bug's opinion. I don't always go with his suggestions, but he helps me to figure out what I really want to do.

Sometimes, it takes a village to make a quilt. I want to thank everyone who left comments with opinions and encouragement as I worked through the assembly process {I'm so happy with the formerly-diagonal-vertically-striped-bias-binding!}. I appreciated the help and it meant a lot that you would take the time to leave a note for me! I'd also like to thank Melissa at Sew Shabby Quilting for her quick needle. The quilting is amazing! And thanks to her, I was able to deliver the quilt to the birthday girl on her actual birthday.

Today's post brought to you by:
My 2013 Finishes

More about this quilt:
First layout and a call out for name suggestions
Backing selected
Allusion to working on the assembly
Ready to assemble and request for name suggestions
The complexities of stripey binding
Binding decided, lessons in quilting and a sneak peek of the finished quilting

Thursday, October 31, 2013

Wizards, Demi-Gods and the Half-Dead

Shadows of a thousand years rise again unseen,
Voices whisper in the trees, "Tonight is Halloween!"

–Dexter Kozen

Costumes have been donned. Faces have been painted. Chili has been eaten. Thinly veiled threats have been made in order to garner candy. It is Halloween!

I love Halloween. It runs in the family. Seriously. Check out my sister's totally awesome Star Trek costumes. Anyway, sometimes I tend to go a little overboard in the planning of the costumes. And the execution and completion of said plans often takes longer than expected. Nevertheless, this year the challenge has been successfully met. And I didn't even have to stay up all night to do it. Almost. But not quite.

LadyBug has been planning her costume since last year. She is Annabeth Chase from the Percy Jackson series of books. We bought and dyed the t-shirt the perfect Camp Half-Blood orange and then I appliquéd the logo on it. We bought the cap {which allows Annabeth to turn invisible} and we made the necklace together.

LadyBug is all about the details, so we couldn't have an Annabeth costume without the necklace. We made beads from cornstarch dough, painted them and strung them together to look like the beads the demi-god kids at Camp Half-Blood get at the end of each summer. The beads have something on them that represents the most significant event that happened in the past year. After we dried the beads for a few hours in the oven, we let them sit overnight. LadyBug put the first coat of paint on and then I put a second one on. She either painted or drew with a metallic paint marker the designs on all the beads except for the green one with the winged sneaker on it, which she asked me to do. Annabeth's beads, from left to right: Thalia's Tree, A Centaur in a prom dress, Greek Trireme, Winged Sneaker, Arrow from the Hunters of Artemis, Trident, Golden Fleece, Daedalus' Maze, Empire State Building.

Cornstarch Clay
1 cup salt
⅓ cup water
½ cup cornstarch
¼ cup cold water

• In a small saucepan, heat the salt and ⅓ cup water over medium-high heat for about 4 minutes, stirring occasionally.
• Remove from heat, stir in the cornstarch and add ¼ cup cold water. The mixture should now look like thick mashed potatoes; stir until it thickens.
• Let cool for a few minutes before kneading or shaping.

Notes
• If the clay is too sticky, knead in a little bit of cornstarch as needed.
• If the clay is too crumbly, place a little bit of water on your fingertips as you work with the clay to moisten.
• Air dry 1 to 4 days. For faster drying, place items on a cookie sheet and place in a 225˚ oven for 4 to 6 hours.
• Food coloring can be kneaded into the clay as desired.
• Store clay in a zippered baggie with a bit of wet sponge or a wet paper towel for up to 2 weeks.

Grasshopper asked me to make his costume in the middle of August, so I couldn't let him down. He found a set of instructions on-line for a Magicka Wizard Robe. Putting the pattern together was a bit laborious and I've almost forgotten how to sew a seam allowance bigger than ¼" or how to use pins. Once I got going, though, it was just like riding a bike and it came together pretty well.

Pretty snazzy mystical, huh? All the tweaking to the pattern paid off. The robe fits Grasshopper so well it's almost like it was custom made for him. Oh. Wait. It was.

This year, I wanted to do something besides my usual Professor McGonagall or Little Red Riding Hood. Pinspired, I decided to go with a little face paint.

Between you and me, I'm exhausted. I was up until 1:00 am finishing up and midnight the night before. I'm going to wash my face, turn off the porch light and go to bed early. Hopefully we won't get egged because we stopped giving out candy before 10:00 pm. And tomorrow I am going to do all the things I've been ignoring in order to pull off Halloween.

Today's post brought to you by:
My 2013 Finishes

Monday, October 14, 2013

Sea Glass

Earth and sky, woods and fields,
Lakes and rivers, the mountain and the sea,
Are excellent schoolmasters,
And teach some of us
More than we can ever learn from books.

–John Lubbock

Finishes have been few and far between around here lately. I'd almost forgotten that awesome “got it done” feeling. And so I'm completely thrilled to show you my latest quilt, finished in time to be delivered to a very dear friend, Michelle, on her birthday last Saturday.

This amazing lady and her family have a special spot in my heart {see also; Birthday Aprons, Jazz Jammies, Baby Frolic and Echoes of Eternity}. Seven weeks ago, she had a serious health issue and was taken to the hospital by ambulance. I wanted to do something special for her. And by special, I mean make her a quilt. I tossed around ideas of finishing a quilt that I already had cut or one of the ones that I already had partially assembled, but nothing seemed to fit. With a prayer in my heart to find the right design and the desire to make something simple and fast enough to get it to her when she needed it, I rummaged through my stash and came across a page I'd ripped out of a catalog and put with some cute prints with the intent to use them to make that quilt. A plan began to form.

I bounced ideas off Mr. Bug as I auditioned fabrics. I knew that batiks were the way to go. I {re}discovered two yards of a very pretty brown batik in my stash. That amount of yardage is unusual for me. Most of the time I only buy half-yard cuts. The majority of my batik stash is fat quarters {because Connecting Threads sells fat quarters at regular yardage prices. Woot!}. When I bought the piece of brown, probably a year or more ago, the lady at the cutting counter asked me what I was making. I told her that I didn't know, but the fabric was pretty and I had to have some. When I came across it, I knew it would be perfect for the borders and the long rectangles in this quilt.

At first I was thinking of going with a rainbow spectrum for the colored squares. But the turquoises, greens, blues and purples really stood out. They reminded me of the ocean and I started turning over names for the quilt. Enchantment Under the Sea? Cheesy movie reference. How about just Under the Sea? A slightly less cheesy movie reference. And halfway through the second verse of the song of that name from The Little Mermaid, I realized two things. First, I know the whole song, which just goes to show that you never know which bit of useless information is going to stick. And second, I couldn't name the quilt that or everybody would be singing that song in their head every time they saw the quilt. I dug a little deeper and Sea Glass came to mind. The name was perhaps inspired by the sea colors combined with the stained glass effect the batiks create. Or maybe it was an echo of a memory of a quilt that Kelly called Sand and Sea Glass. Maybe it was both.

When considering which solids to use, I wanted something with a similar weight and feel to the batik fabrics. I'd worked with Pat Bravo's Pure Elements solids and knew that would be the perfect fit. I choose Creme de la Creme {reminiscent of sand} and Coffee Bean {because the pattern called for a dark sashing}.

Then I did a little research on sea glass, to see if I was headed in the right direction with the name. What I found was pretty interesting. According to Wikipedia, sea glass is physically and chemically weathered glass found on beaches along bodies of salt water. Sea glass begins as normal shards of broken glass. The glass is rolled, ground and tumbled in the ocean for years until all of the edges are rounded off and the slickness of the glass has been worn to a frosted appearance. Most sea glass comes from bottles, but it can also come from jars, plates, windows, windshields and ceramics, either from waste discarded into the ocean or even from shipwrecks. Among the most common colors are white {clear}, brown and green. Blue is less common and purple even less.

Sea Glass seemed to fit perfectly for this quilt.

I set to work and soon discovered that I would not be able to finish this quilt in the short time period I'd set for myself. I debated back and forth and back and forth again on whether I should have it quilted by a long-armer or do it myself. I decided to extend my deadline, quilt it myself and make it a birthday gift. But time got away from me and my second deadline was looming close. I made a rescue call to Melissa at Sew Shabby Quilting, who fit in my rush order and enabled me to finish the quilt in time for Michelle's birthday. {The Voices, Reason and Passion, had a lot to say about that and I couldn't get them to stop arguing. But a third Voice, Experience, kept saying “wash the quilt.” And she was right. Once it was washed and crinkly and soft, I absolutely loved it and it didn't matter anymore that I hadn't quilted it myself. All the Voices were satisfied. Passion did a beautiful job with the colors and precision piecing. Reason got it to the long-arm quilter because that was the only way to get it done in time. And Experience knew how to make Passion and Reason play nicely together.} You can see my original quilt label at the bottom left of the photo below, which was for when I was planning on doing the quilting. I cut the Sea Glass portion of the label {made of French knots in 20 different colors of floss so as to look like bits of sea glass arranged on the sand to spell out the words} away from the rest, made a new “information” section, giving Melissa quilting credits, and sewed it into my strip of fabric along the seam of the quilt {top right photo below}.

As a side note, not only is the top of the quilt a palindrome, but the back of the quilt is as well {cream, chocolate, brown batik, chocolate, palindrome [more or less] strip of colored fabrics w/label, chocolate, brown batik, chocolate, cream}.

This was a fun gift to deliver. Upon opening the quilt, Michelle asked the name of it and curious to see if I'd put anything on the back, she flipped it over and looked at the label. I explained that the colors inspired the name Sea Glass. She told me that their family loves to go to the ocean. Many of their summer vacations are spent at the beach. She told me that they had been to Catalina Island once and took a tour in a glass-bottomed boat. She said that the sun shone through the waters and made everything look vibrant and the quilt reminded her of that.

I remembered the prayers I'd had in my heart while I worked on fabric and pattern choices and when to get it to her and knew that they had been answered.

Today's post brought to you by:
My 2013 Finishes

Monday, May 20, 2013

Gilbert's Grape Ultra-Mini Star Quilt, Amish Style

Becky: I love the sky. It's so limitless.
Gilbert: It is big. It's very big.
Becky: Big doesn't even sum it up, right? That word big is so small.
What's Eating Gilbert Grape, 1993

This is my adorable LadyBug. As part of their U.S. studies, the 5th graders at LadyBug's elementary school are assigned a project on one of the states. The project is done in partners and includes a poster with details about the state and a float that represents that state. LadyBug was assigned to a team of three. She and the other girl in their group put the float together and the third man on their team did the poster. When Grasshopper was in the 5th grade, he also had to do a float {he had Tennessee, if you were wondering}, so we recycled the base for LadyBug's project {there's no sense in wasting good fringe, right?} and they stripped it down to the basic elements. Then LadyBug and her partner reinvented the float. I'm not sure how they got anything done, because I didn't hear a peep out of either one of the girls while they were here, but somehow, it came together really well. They painted the base green {like grass} and added the state seal and state quarter for Pennsylvania. LadyBug's partner supplied the Amish LEGO barn, and together they put together the little LEGO Hershey's factory workers and the state abbreviation {PA, seen in reverse behind the state seal because it is facing backwards} in LEGOs.

And then I butted right in and made a tiny quilt to go on the float. I had exactly eight - 1” HST's left from the label on Miss Butterfly's Zig-Zag quilt, and from that a star was born. The finished quilt is 4¾-ish”, and is hand quilted because that's how the Amish would do it. I'm not showing you the back though. A few stitches in, I realized that I could make teeny, tiny, ultra-mini stitches, or I could quilt it the right way. I picked the ultra-mini stitches.

After LadyBug's assignment was finished, she gave the quilt to her {stuffed} pet lizard, Gilbert.

Gilbert has a spot on LadyBug's bed and every night, she tucks him in before she gets tucked in herself. Until Gilbert got his new quilt, he was sleeping under an eyeglass lens cleaning cloth. Doesn't he look cozy?

Today's post brought to you by:
My 2013 Finishes

Thursday, May 16, 2013

Folded Fabric Star: Tote Bag Edition

Though my soul may set in darkness,
It will rise in perfect light,
I have loved the stars too fondly
To be fearful of the night.
–Sarah Williams

Once upon a time, I saw a really cool folded fabric star. And so, of course, I had to make my own.

I went to the tutorial, decided I was definitely not going to make a pot holder, got my fabrics ready and made a tote bag. Geta deserves the credit for the tote bag idea. I made the straps nice and long so that I could comfortably put it over my shoulder and not have the bag hitting me just under the armpit.

I had most of this bag finished before I dropped Grace off for her three-week spa vacation on April 10th. As a matter of fact, on the day I took her in I only needed to put on the binding around the top of the bag, but didn't dare take the time to do it for fear of missing the repair man's pick-up time {which is not an exact time; just whenever he gets to the shop on that particular Wednesday} and have to wait another week. By the time I got Grace back on May 3rd, I'd moved on to other things and this bag sat for another couple of weeks. Sometime very early this week, or maybe even late last week, I lost my mojo. I got kind of worried there for a bit, when my funk lasted for more than a day or two and my desire to sew completely vanished. I picked this back up with the hope that doing something easy that would lead to a quick finish would put me back in my groove. It didn't really. I finished this several days ago and wasn't super excited about it. Eventually my mojo came back all on its own, though, and I am really happy with how it turned out.

The red center of the star isn't quite large enough. While I actually did read through the directions, when it came time to place the fabrics, I just looked at the pictures and missed the part about moving the second fabric ½” down from the first and leaving ¼” between fabrics after that. But there was no way I was unpicking. Next time I'll remember. And there probably will be a next time because I need a cool tote bag for church. I added an extra color, using nine fabrics instead of just eight. To compensate, I increased the base fabric and the width of the fabric rectangles by ½”. I'm pretty happy with how it turned out. I kept the quilting simple. Actually, I just copied the quilting in the tutorial, not wanting to distract from the star of the show, the folded fabric star. And I didn't think the bag itself needed anything fancy, either. I just did straight lines on the front and diamonds, or intersecting lines at a 45˚ angle on the sides and back.

I'm using this as my “go bag” for hand sewing projects. I almost always take a little something to work on when I know I'm going to be sitting and waiting, like at the doctor's office or the driver license division or a book signing. I've been using ziplock bags, which keep the project clean, but they're a little tricky to juggle when the waiting stops and the business to attend to commences. I'll keep my Stitchy Kit inside it all the time, and I'll probably still use ziplock bags to hold my projects, but I'll slip those inside the tote bag when it is time to go. Functional and fabulous, no?

Today's post brought to you by:
Show Off Friday at Pieceful Life

My 2013 Finishes

Wednesday, April 17, 2013

Random Bits: Vol. 9

If you don't get lost, there's a chance you may never be found.
–Unknown

Thoughts On Boston
My heart is heavy for those who were effected by the bombs at the finish line of the Boston Marathon. It is difficult to make sense of such a tragedy. My thoughts and prayers are with the families whose lives are forever changed.

In the wake of such an event, and with things like this becoming more and more common, it is hard not to let fear become the overriding influence. It is hard to think there might be hope for a world so full of bad. But there is hope. It comes from faith. For me, faith is knowing that God has a plan for me and that even though life is full of hard things and bad things, with His help, I can carve out my own little haven within my own home and I can overcome the hard and the bad. I will do my best to be prepared to help my family and myself when something bad happens us and do my best help others when something bad happens to them and leave the rest up to God. However you define it, faith is the opposite of fear. I choose to act in faith.


New Ironing Board Cover
Almost three years ago, I made a reversible ironing board cover for my small ironing board. Since then, I've done a lot of ironing. I've washed it several times, and worn a hole clean through the fabric. There were still a few good patches here and there, but the main ironing space was pretty much done for.

The other side was even worse.

It was time for a new cover.

I finished this up last week, but haven't had much time for posting. Isn't it pretty? This cover is reversible as well, but I used the same fabric on both sides so I don't have to feel bad when one side gets worn out. I can just flip it over and have the same pretty fabric all over again. I used three layers of pre-shrunk Warm 'n Natural in the middle. I did three layers on the last cover and there was pretty much nothing left in the end. In order to hopefully give the fabric a little bit more wear, I used the last bit of the 10-yard package of Mistyfuse I won three years ago to fuse a layer of white muslin to the back of the fabric. It gave the fabric a nice body, which I'm happy with. Only time will tell if it makes a difference in the wear.

I put a pretty yellow binding on to house the cord that pulls it tight around the ironing board. And I left the original cover and foam padding on the ironing board under my cover to prevent any rust that might occur, due to condensation of steam, being transferred to the side that is down. Every time I wash my cover, I decide I'm going to take that old foam and cover off because they are ugly from the underside, but then I get in there and remember that the metal rusts a bit and decide to leave it.

I've already put this cute little ironing board to use. I dropped Grace off for a three-week holiday last week. She's one of those “fancy” machines that don't require oiling, except by professionals, who take their sweet time and charge you an arm and a leg for it. While she's getting the royal spa treatment, I've got plenty to keep me busy and I'll show you what I've been up to tomorrow. Or as soon as I get the pictures edited.

Today's post brought to you by:
My 2013 Finishes

I Am Way Too Old {and LadyBug is way too young} for General Admission
or Lindsey Stirling Live

It's been almost three weeks now since we had a little adventure with general admission concerts, but I wanted to share it with you anyway.

Lindsey Stirling is one of our favorite YouTube musicians. So when I saw that she was going on tour, I thought it would be fun to go and see her. I bought tickets in mid-January, 2½ months before the concert, and smiled to myself every now and then at the secret I was keeping. Mr. Bug was in on it and we waited until two weeks before the concert for the big reveal. We gave two tickets to my dad for his birthday {hoping he'd use the spare to bring my mom} and at the same time told the Not-So-Little Bugs that we were all going to see Lindsey.

I was certain it was going to be beyond awesome.

People started asking where the concert was, and when we told them the venue, we were informed that there was no seating. At all. I was certain this couldn't be the case. A Lindsey Stirling violin concert certainly would not be without seating. I mean, how could you enjoy the music? I searched the FAQ's on the venue's website, and even tried calling & e-mailing to find out about seating. I hoped they might set up folding chairs or something. But I never heard back. I'm sure they just laughed at my inquiries. Besides the question of seating, there were other objections to the location, namely that it was a bar and we were taking children. But as the concert was billed as “all ages” we decided to take our chances and hope for the best.

As promised, there was no seating. And it was a bar. Fortunately, there was a separated 21-and-older area, to which the alcohol was confined. But there was nothing to be done about the lack of seating.

The opening act was 30 minutes of pure torture. I'm certain that there had been no sound check for this group, because all you could hear was the bass, which vibrated in a very odd place at the base of your throat in the center of your collar bone.

Happy Birthday, Dad. I love you. Oh, and by the way, I'm subjecting you to cruel and unusual punishment as a gift.

We'd managed to find a spot behind the “sound booth” that wasn't overly crowded, relatively speaking, and the shorter persons in our group could climb up onto a raised platform sort of thing and see over the very tall people who crowded in front of us as Lindsey took the stage. As people pressed in, trying to get a better look, it got warmer and warmer. I tied my hair in an actual knot to keep it off my neck. I stood on my tip-toes and peered between the abnormally tall people in front of me to see.

And Lindsey was awesome.

After about an hour, LadyBug had pretty much had her fill of standing and being too hot. She literally melted into a puddle of tears. She doesn't do well with excessive heat and all those bodies were producing a lot of it. She and I went to the back of the venue where the crowd was thinner and sat down by the open doors to cool off. My parents followed shortly and after another 20 minutes or so, we coaxed Mr. Bug and Grasshopper, who was having a marvelous time, out of the mosh pit, via text, and headed home right in the middle of Phantom of the Opera.

I learned several things from this experience. Number 1: check out the venue before you buy the tickets. Number 2: general admission with no seating should be designated as appropriate for ages 13 to 27. Period. Number 3: Lindsey Stirling is really that awesome, and I am determined to attend a concert of hers that has seating.

For now, I'm going to sit back and enjoy her from the comfort of my office chair.